Seed refrigeration, or cold stratification, is a process essential for gardeners aiming to grow plants from seeds that require specific environmental cues to break dormancy and begin germination. Certain plant species, particularly perennial flowers and trees, need exposure to cold temperatures before they will sprout. This method mimics the winter conditions these seeds naturally experience, enabling them to “wake up” from dormancy and start the germination process. In this article, we will delve deep into the science behind seed dormancy, the benefits of refrigeration, how to properly cold stratify seeds, and the most common mistakes gardeners make. By understanding the process of seed refrigeration, you can significantly enhance your success rate when growing plants from seeds.
Understanding Seed Dormancy
Before diving into the details of seed refrigeration, it’s essential to understand what seed dormancy is and why it occurs. Seed dormancy is a mechanism plants use to ensure that their seeds do not sprout prematurely, before the right conditions for growth exist. This dormancy serves as a survival strategy, keeping seeds from germinating during harsh seasons such as winter, when conditions are not favorable for growth.
For many plants, dormancy is broken by environmental cues such as light, moisture, and temperature changes. One of the most significant of these cues is cold temperatures, which many seeds require before they can begin germinating. When seeds are exposed to cold temperatures for a certain period, the process triggers biochemical changes inside the seed, ending its dormancy and enabling it to sprout once planted.
The Science Behind Seed Stratification
Seed stratification is a term used to describe the process of treating seeds to simulate the natural conditions they would experience outdoors. In the case of cold stratification, this involves exposing seeds to moist, cold conditions, typically by refrigeration. This process helps to break down the natural inhibitors in the seed coat, which otherwise prevent the seed from sprouting prematurely.
Cold stratification provides the necessary environmental cues for seeds to overcome their dormancy. This mimics the chilling effect of winter, encouraging seeds to break dormancy and prepare for germination. The exposure to cold temperatures can last anywhere from a few weeks to several months, depending on the seed variety, and is essential for those seeds that naturally undergo a cold stratification process in the wild.
Why Refrigerating Seeds Before Sowing Works
The process of refrigerating seeds before sowing offers several advantages that directly contribute to successful germination:
- Breaks Dormancy: As mentioned earlier, refrigeration provides the cold temperatures many seeds need to break dormancy. This process can be critical for plants that require a period of cold before they can sprout.
- Improves Germination Rates: Seeds that undergo proper cold stratification generally have higher germination rates. Without the necessary cold treatment, many seeds may fail to sprout, resulting in wasted time and effort.
- Uniform Germination: Cold stratification ensures that seeds germinate at the same time, providing a more uniform growth pattern for your plants. This is particularly beneficial when starting plants from seeds that require cold treatment, such as certain perennials or trees.
- Prevents Mold and Decay: Refrigeration, when done correctly, can help to prevent seeds from molding or decaying by maintaining a balanced level of moisture and temperature. The cool conditions help preserve the seeds’ viability over an extended period, ensuring they remain ready for germination when the time comes.
How to Properly Refrigerate Seeds for Stratification
Refrigerating seeds is a straightforward process, but it requires some attention to detail to ensure that the seeds are properly prepared and maintained. Here’s a step-by-step guide on how to refrigerate seeds for cold stratification:
Materials Needed:
- Seeds: Choose the seeds that require cold stratification, such as those for lavender, poppies, or certain tree species.
- Moist Medium: Seeds should be stored in a moist medium to help simulate the natural environment in which they would undergo cold stratification. Common options include sand, vermiculite, or a damp paper towel.
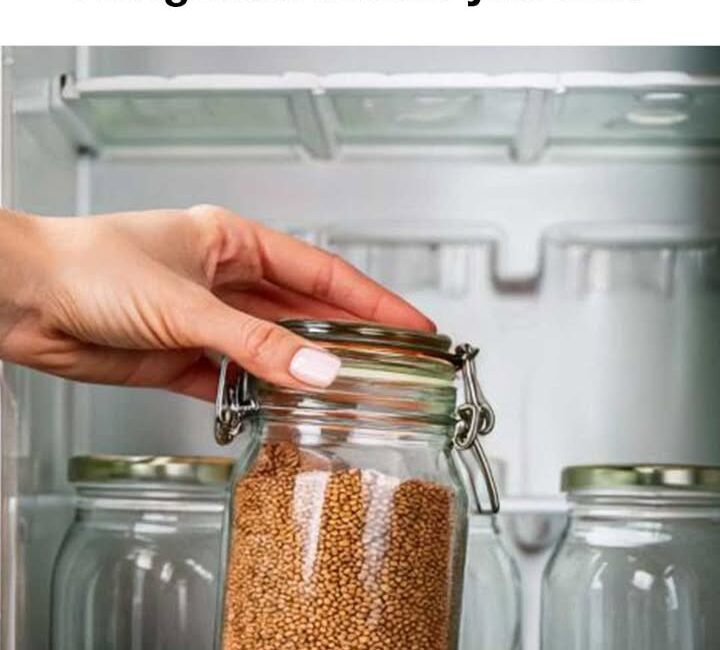
- Plastic Bag or Container: A sealable plastic bag or container helps maintain humidity around the seeds while also protecting them from drying out.
- Refrigerator: Your regular home refrigerator will work, set to a temperature between 33°F and 41°F (1°C to 5°C).
Step-by-Step Process:
- Prepare the Seeds: Start by cleaning the seeds if needed. Some seeds, like those of certain trees, may have a hard seed coat that needs to be scarified or lightly scratched before stratification. Check the seed packet for any specific instructions regarding pre-treatment.
- Moisture Application: Place your seeds into a moist medium such as dampened paper towels, sand, or vermiculite. Ensure that the medium is moist but not soaking wet. Too much moisture can lead to mold or seed rot, while too little moisture may fail to break dormancy.
- Seal the Seeds: Place the seeds and the damp medium in a plastic bag or airtight container. The goal is to maintain a high level of humidity around the seeds while they are in the fridge.
- Refrigeration: Store the sealed bag or container in the refrigerator. For most seeds, the optimal temperature for stratification is between 33°F and 41°F (1°C and 5°C). Avoid freezing the seeds as it can damage them, and make sure the refrigerator maintains a consistent temperature.
- Stratification Duration: The length of time seeds need to be refrigerated can vary based on the plant species. For example, lavender seeds may need 4 to 6 weeks of cold stratification, while milkweed seeds may need anywhere from 30 to 60 days. Research the specific requirements of your seeds for the best results.
- Monitor Moisture Levels: Check on your seeds periodically during the stratification process to ensure they remain adequately moist. If the medium appears too dry, lightly mist it with water to maintain the proper moisture level.
- Planting: After the appropriate stratification period, remove the seeds from the refrigerator and plant them according to the instructions for the specific plant species. Keep in mind that some seeds may need to be sown immediately after refrigeration, while others may benefit from being planted outdoors in specific conditions.
Common Mistakes in Seed Refrigeration
While seed refrigeration is a relatively simple process, there are some common mistakes that gardeners may make:
- Inadequate Moisture: Failing to provide enough moisture during refrigeration is a common mistake. Seeds that dry out may not break dormancy properly and could fail to germinate.
- Incorrect Temperature: Storing seeds at temperatures that are too warm or too cold can damage them. Ensure that the temperature remains within the optimal range of 33°F to 41°F (1°C to 5°C).
- Insufficient Stratification Time: Some seeds require a long period of cold exposure to break dormancy. Shortening this period could lead to lower germination rates.
- Failure to Research Seed Requirements: Not all seeds need cold stratification. It’s important to research each plant variety to determine whether cold stratification is necessary for successful germination.
Top 12 Seeds That Require Refrigeration
Many types of plants benefit from refrigeration before sowing. Here are 12 common seeds that require cold stratification:
- Lavender: Requires 4 to 6 weeks of cold stratification.
- Milkweed: Requires 30 to 60 days of cold stratification.
- Coneflower: Needs cold stratification for about 3 to 4 weeks.
- Lupine: Benefits from cold treatment for 30 days.
- Columbine: Requires a cold period of 30 to 60 days.
- Delphinium: Needs cold stratification for 6 to 8 weeks.
- Poppy: Requires 30 days of refrigeration.
- Bluebell: Needs cold treatment for 10 to 12 weeks.
- Primrose: Cold stratification required for 2 to 4 weeks.
- Apple: Cold stratification is important for germination of tree seeds.
- Cherry: Requires 2 to 3 months of cold stratification.
- Maple: Needs a cold period of 30 to 60 days.
How Refrigeration Affects Germination Rates
Refrigerating seeds helps mimic natural winter conditions, which can greatly increase germination rates. By undergoing cold stratification, seeds are better prepared to germinate once they are exposed to warmth and moisture. This process ensures that the seed has “woken up” from dormancy and is ready to sprout, leading to higher success rates when planting seeds that otherwise wouldn’t sprout.
Alternative Methods to Seed Refrigeration
While refrigeration is a powerful tool for seed stratification, it’s not the only method available. Other techniques, such as soaking seeds in water, using scarification to break the seed coat, or employing chemical treatments, can also be used to break dormancy. However, these methods are generally less effective for seeds that specifically require cold stratification.
Frequently Asked Questions About Seed Refrigeration
- How long should seeds be refrigerated? The duration depends on the seed type. Some seeds may only require 4 weeks, while others may need up to 3 months. Always check the seed packet for specifics.
- What temperature is ideal for seed stratification? The optimal temperature for cold stratification is between 33°F and 41°F (1°C to 5°C).
- Can all seeds be refrigerated? No, only seeds that require cold stratification should be refrigerated. Always research the needs of each seed type before refrigerating.
Conclusion: The Importance of Refrigeration for Successful Sowing
Refrigerating seeds before sowing is a crucial step for many plants, particularly those that require cold stratification. This simple yet effective process mimics winter conditions and encourages seeds to break dormancy, leading to higher germination rates and more successful plant growth. By understanding and following the proper seed refrigeration methods, gardeners can significantly increase their chances of success when growing plants from seed.