Introduction: When Broken Becomes Beautiful
There is something deeply symbolic about broken ornaments. Once they hung proudly on a tree, reflecting light, carrying memories, and adding beauty to a moment. Then, over time, they became scratched, outdated, or accidentally shattered—and suddenly, they were considered useless. Most people would throw them away without a second thought.
But what if broken does not mean finished?
What if those fragments—those irregular, reflective, imperfect pieces—actually hold more creative potential than they ever did when they were whole?
This simple yet powerful DIY idea—breaking old ornaments and stacking them inside a glass jar—goes far beyond decoration. It represents a shift in perception. It shows you how to take something fragile, imperfect, and discarded, and turn it into something that feels refined, intentional, and surprisingly luxurious.
And this matters more than you might think.
Because this project is not just about décor. It teaches you how to work with texture, light, layering, and composition. It trains your eye to see beauty in fragments. It helps you create something visually expensive without spending much money. And for you—especially with your interest in building aesthetic content and creative projects—this idea can become a powerful foundation for both your space and your future creations.
Let’s go deep into this—not just how to do it, but how to understand it.
Why This Simple Idea Looks So Expensive
At first glance, it might seem too simple: break ornaments, put them in a jar, display it. But the final result often looks like something you would find in a high-end interior design store.
Why?
The Core Design Principle: Light + Reflection + Transparency
This project works because it combines three powerful visual elements:
- Reflection → Ornament fragments reflect light in multiple directions
- Transparency → Glass jars allow light to pass through
- Layering → Stacked pieces create depth and dimension
When these three elements interact, they create a visual effect that feels complex and refined.
Teaching Concept: Visual Complexity Creates Perceived Value
Your brain associates:
- Simple = cheap
- Complex + layered = expensive
Even though the materials are inexpensive, the way they are arranged creates the illusion of luxury.
The Beauty of Broken Shapes: Why Imperfection Works
Unlike perfect ornaments, broken pieces are irregular.
And that irregularity is exactly what makes them beautiful.
Teaching Concept: Organic vs Perfect Design
- Perfect shapes = predictable, flat
- Broken shapes = dynamic, interesting
Each fragment catches light differently, creating:
- Sparkle
- Shadow
- Movement
This makes the final piece feel alive rather than static.
Materials: Understanding Each Element’s Role
To master this project, you need to understand the purpose of each component.
Old Ornaments
These are your primary material.
Best types:
- Glass ornaments (for reflection)
- Metallic finishes (for shine)
- Different colors (for layering effects)
Glass Jar or Vase
This is not just a container—it is part of the design.
Important qualities:
- Clear glass for maximum light interaction
- Smooth surface to contrast with sharp fragments
- Shape that complements your style
Safety Equipment
This step is critical.
- Gloves protect your hands
- Goggles protect your eyes
Towel or Cloth
Prevents pieces from scattering and protects surfaces.
Step-by-Step Guide: Creating Your Ornament Jar
Step 1: Preparing Your Workspace
Lay down a towel and wear protective gear.
Teaching concept: Controlled Environment
Good design starts with control. You want to manage the process safely and intentionally.
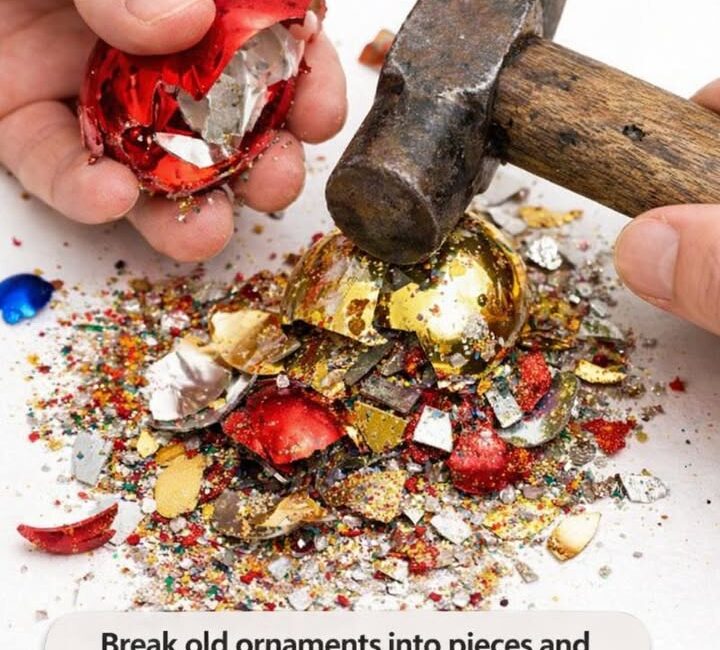
Step 2: Breaking the Ornaments
Gently tap the ornaments with a hammer.
Important:
- Do not smash aggressively
- Aim for varied sizes
Teaching Concept: Controlled Imperfection
You are not creating chaos—you are creating intentional randomness.
Step 3: Sorting the Pieces
Before placing them in the jar, sort by:
- Color
- Size
- Texture
This gives you control over the final look.
Step 4: Layering Inside the Jar
Start placing pieces inside the jar.
You can:
- Mix randomly
- Create color layers
- Build gradients
Teaching Concept: Layering for Depth
Click page 2 to continue