Introduction: Turning a Simple Potato into a Living System
There is something deeply satisfying about growing your own food.
Not just because it saves money or looks aesthetic, but because it reconnects you with something real, something grounded. In a world where everything feels fast, digital, and sometimes overwhelming, growing a plant—even something as simple as a potato—can bring a sense of calm and control.
And here is the surprising part:
👉 You don’t need a garden.
👉 You don’t need expensive tools.
👉 You don’t even need experience.
All you need is:
- A potato
- A jar
- Water
- And the right method
But here’s where most people fail:
They try random “hacks” that look easy… but don’t actually work.
In this article, you will learn a rooting method that truly works, backed by real plant behavior—not trends. You will also understand why it works, so you can repeat it successfully every time.
Understanding the Potato: Why It Can Grow in a Jar
Before jumping into the method, you need to understand what a potato actually is.
👉 A potato is not a root.
👉 It is a tuber.
What is a Tuber?
A tuber is a storage organ.
It contains:
- Nutrients
- Energy
- Dormant buds (called “eyes”)
Each “eye” can grow into:
- A stem
- Leaves
- Roots
👉 This is why potatoes are perfect for home propagation.
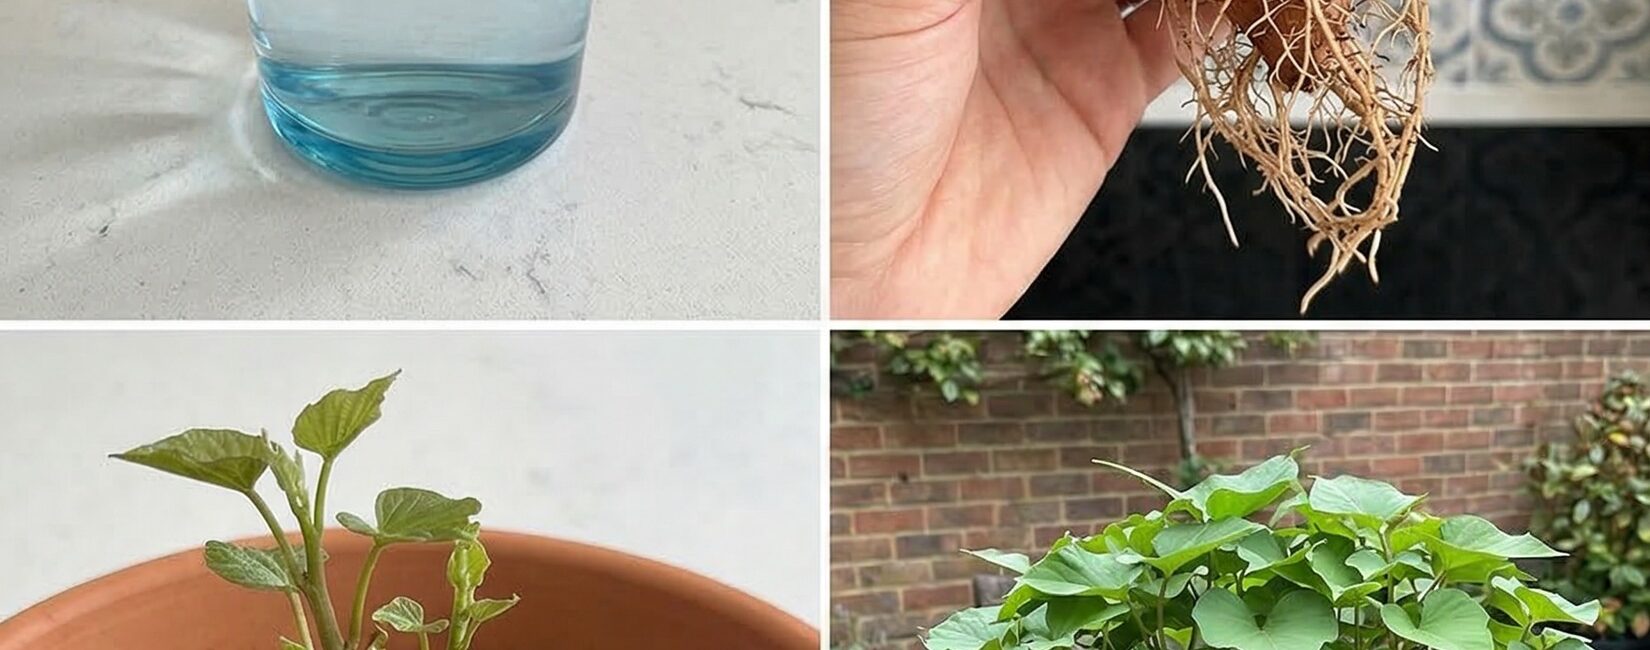
Why the Jar Method Works (When Done Correctly)
The idea is simple:
You suspend the potato in water so roots can form.
But success depends on one key principle:
👉 Balance between oxygen and moisture
If the potato is:
- Fully submerged → it rots
- Too dry → it doesn’t grow
The correct method allows:
- Roots to grow in water
- The top to stay dry and breathe
The Step-by-Step Rooting Hack That Actually Works
Let’s go through it carefully.
Step 1: Choose the Right Potato
Not all potatoes work the same.
What to Look For
✔ Organic potatoes (very important)
✔ Visible “eyes” or small sprouts
✔ Firm texture (not soft or wrinkled)
👉 Why organic?
Many store-bought potatoes are treated to prevent sprouting.
Step 2: Pre-Sprouting (The Secret Most People Skip)
This is the real “hack.”
Before putting the potato in water:
👉 Let it sprout first.
How to Do It
- Place the potato in a dry, dark place
- Leave it for 5–10 days
- Wait until small sprouts appear
👉 Why this matters:
Sprouting activates the potato’s growth system.
Without this step, rooting is slow or fails.
Step 3: Prepare the Jar Setup
You will need:
- A glass jar
- 3–4 toothpicks
How to Position the Potato
- Insert toothpicks around the middle
- Place it on top of the jar
- Bottom half in water, top half out
👉 Important rule:
Only the bottom touches water.
Step 4: Water Level and Quality
Fill the jar so that:
- Only the lower part is submerged
Use:
- Clean water
- Preferably filtered or rested water
👉 Change water every 2–3 days.
Step 5: Light Placement
Place the jar:
- Near a window
- With indirect sunlight
Avoid:
- Direct strong sun
- Dark corners
👉 Why:
Light stimulates growth but too much heat damages it.
Step 6: What Happens Over Time
Click page 2 to continue