Corn on the cob is one of the joys of summer, but what happens when the season ends, and you still crave that sweet, fresh flavor? Freezing corn on the cob is a great way to preserve its taste and enjoy it year-round. Freezing corn, while simple, requires a few steps to ensure it retains its flavor, texture, and nutritional value. In this article, we’ll guide you through the process of freezing corn on the cob the right way, step by step, and provide some tips on how to make sure you enjoy the perfect frozen corn every time.
1. Why Freeze Corn on the Cob?
Corn on the cob is delicious when it’s in season, but during the winter months, fresh corn can be expensive and hard to find. Freezing corn allows you to preserve that sweet, tender flavor for months, so you can enjoy it long after summer has ended. Freezing also locks in the nutrients, so you can maintain the corn’s vitamins and minerals. By freezing corn on the cob, you eliminate the need for canned or frozen corn varieties, which often contain added preservatives or flavorings.
2. Choosing the Right Corn
The first step in freezing corn is choosing the right ears of corn. For the best results, select fresh, ripe, and tender ears. Look for corn that has:
- Bright Green Husks: The husks should be green, moist, and tightly wrapped around the cob. If the husks are dry or have holes, the corn may not be fresh.
- Plump Kernels: When you peel back a small section of the husk, the kernels should be full and firm. They should be evenly spaced with a rich, creamy color. Avoid corn with dried-out or missing kernels.
- Fresh Silk: The silk should be golden and fresh, not brown or shriveled.
The best time to freeze corn is when it’s in season, typically in late summer or early fall. This ensures that the corn is at its peak in flavor and sweetness.
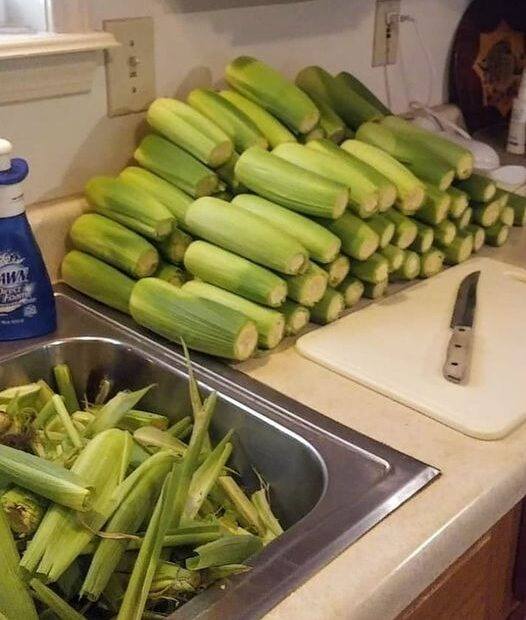
3. Preparation: Husk and Clean
Once you have your fresh ears of corn, you’ll need to prepare them for freezing. This step involves husking, removing the silk, and cleaning the corn. Here’s how to do it:
a. Husk the Corn
Peel back the outer green husk to reveal the yellow or white kernels underneath. Remove all of the husk leaves completely. You may want to keep the husks for other uses, such as making tamales or using them for grilling.
b. Remove the Silk
The silk (the long, stringy fibers inside the husk) should be removed from the corn. A small brush or your hands can help to pull off the silk strands, but you’ll want to make sure the corn is completely clean before freezing.
c. Rinse the Corn
After husking and removing the silk, rinse the corn under cold water to remove any remaining dirt or debris. The cleaner the corn is, the better the quality of the frozen product will be.
4. Blanching the Corn on the Cob
Blanching is an essential step when freezing corn because it stops the enzyme activity that causes the corn to lose flavor and texture. It also helps to preserve the corn’s color and nutritional content. There are two common ways to blanch corn: boiling or steaming. Here’s how to blanch your corn on the cob:
a. Boiling Method
- Fill a Large Pot with Water: Use a large pot, enough to fully submerge the corn.
- Bring the Water to a Boil: Once the water is at a rolling boil, carefully place the ears of corn into the pot. You may need to blanch the corn in batches if it doesn’t all fit in the pot at once.
- Boil for 4-6 Minutes: Boil the corn for 4 to 6 minutes, depending on the size and tenderness of the corn. Smaller ears may take less time, while larger ones may need a bit longer.
- Transfer to Ice Water: After boiling, immediately transfer the corn to a large bowl of ice water. This will stop the cooking process and help the corn maintain its crispness.
b. Steaming Method
If you prefer to steam your corn, the process is similar to boiling but with a few slight differences:
- Set Up a Steamer Basket: Place a steamer basket over a pot of simmering water, ensuring the corn does not touch the water directly.
- Steam for 6-8 Minutes: Steam the corn for 6 to 8 minutes, ensuring that the kernels soften and cook evenly.
- Cool in Ice Water: After steaming, immediately transfer the corn to ice water to halt the cooking process.
5. Cutting or Leaving the Corn on the Cob
After blanching, you have a choice: leave the corn on the cob or cut the kernels off. This decision depends on your preference and how you plan to use the corn later.
a. Leaving the Corn on the Cob
Some people prefer to freeze their corn on the cob because it retains its original form and can be roasted, boiled, or grilled directly from the freezer. If you choose to freeze the corn on the cob, it’s important to wrap each ear tightly in plastic wrap or foil to prevent freezer burn.
b. Cutting the Kernels Off the Cob
If you prefer to freeze only the kernels (for easier storage or to use in recipes like soups, casseroles, or salads), follow these steps:
- Cut the Kernels: After blanching and cooling the corn, use a sharp knife to cut the kernels off the cob. Place the cob on a cutting board and slice downwards with a knife, cutting as close to the base of the kernels as possible.
- Use a Bowl to Catch the Kernels: To avoid mess, place a large bowl underneath the corn or use a bundt pan (with the cob stuck through the hole) to catch the kernels as you cut.
6. Packaging the Corn for Freezing
Once the corn is either left on the cob or cut into kernels, you’ll need to package it properly for freezing. Proper packaging ensures the corn stays fresh and prevents freezer burn.
a. Packaging Corn on the Cob
- Wrap the Cobs: If you’re freezing corn on the cob, wrap each ear tightly in plastic wrap or aluminum foil. Make sure there is no exposed corn to prevent freezer burn.
- Place in a Freezer Bag: After wrapping, place the cobs in a heavy-duty freezer bag. Squeeze out as much air as possible before sealing the bag. Label each bag with the date of freezing.
b. Packaging Corn Kernels
- Use Freezer Bags or Containers: If you’re freezing kernels, portion the kernels into freezer bags or airtight containers. Try to remove as much air as possible to prevent freezer burn.
- Flatten the Bags: When using freezer bags, flatten them out so the kernels are in a single layer. This makes it easier to store the corn and helps it freeze faster.
- Label the Bags: Don’t forget to label the bags or containers with the date of freezing so you can keep track of how long the corn has been stored.
7. Freezing the Corn
Once the corn is properly packaged, place it in the freezer. Try to spread out the bags or containers to allow for even freezing. Once frozen, the corn can be stored for up to 6-8 months for the best flavor. Although corn can last longer than this in the freezer, the quality may begin to degrade after this time.
8. Thawing and Cooking Frozen Corn
When you’re ready to enjoy your frozen corn, there are several ways to thaw and cook it:
a. Thawing
You don’t always need to thaw corn before cooking. In fact, frozen corn can be added directly to soups, stews, or casseroles without thawing. However, if you want to thaw it:
- In the Fridge: For best results, place the frozen corn in the fridge overnight.
- Quick Thaw in Water: For quicker thawing, place the frozen corn in a bowl of cold water for about 30 minutes.
- Microwave: If you’re in a rush, you can microwave the corn in short intervals, stirring occasionally, until it’s heated through.
b. Cooking
To cook frozen corn on the cob:
- Boil: Place the frozen corn in a pot of boiling water for 5-7 minutes until heated through.
- Grill: You can also grill frozen corn on the cob. Wrap it in foil and place it on the grill for 10-15 minutes, turning occasionally.
To cook frozen corn kernels:
- Boil: Place the kernels in boiling water for 2-3 minutes.
- Sauté: You can also sauté the kernels in butter or oil for 5-7 minutes until heated through and slightly caramelized.
9. Tips for Freezing Corn
- Don’t Skip Blanching: Blanching is crucial for preserving the flavor and texture of corn. Don’t attempt to freeze it raw, as it will lose its taste and become tough.
- Use Freezer-Safe Bags: Make sure you use high-quality, freezer-safe bags or containers to avoid freezer burn.
- Freeze Corn Immediately: After blanching, make sure to freeze the corn as soon as possible. The longer it sits at room temperature, the more flavor and quality it will lose.
Conclusion
Freezing corn on the cob is an excellent way to capture the essence of summer and enjoy it long after the season ends. By following these steps—selecting fresh corn, properly blanching it, and packaging it correctly for the freezer—you can have corn that tastes just as sweet and tender as when it was freshly picked. Whether you choose to leave the corn on the cob or remove the kernels, proper freezing techniques will allow you to enjoy corn year-round. Happy freezing!