Bread is a staple food loved all over the world. The aroma of freshly baked bread, its soft texture, and delicious taste are irresistible. But what if I told you that you can make incredible bread at home without using an oven? Yes, you read that right — no oven needed!
Whether you don’t have an oven, your oven is broken, or you simply want to try something new, this no-oven bread recipe will change your life. Imagine pulling a warm, soft, homemade loaf straight from a pan on your stovetop. It’s unbelievably good and so simple to make that you’ll never want to buy bread again.
Why Make Your Own Bread?
Before we dive into the recipe, let’s talk about why baking your own bread — especially without an oven — is such a fantastic idea:
1. Freshness and Quality
Store-bought bread often contains preservatives, artificial flavors, and additives to extend shelf life. When you bake at home, you control the ingredients, ensuring every bite is fresh and natural.
2. Cost-Effective
Buying bread regularly adds up. Making bread at home with simple pantry ingredients like flour, milk, and oil is incredibly budget-friendly.
3. Customization
You can tweak the recipe to suit your tastes and dietary needs — add herbs, spices, seeds, or switch to whole wheat or gluten-free flour.
4. Convenience Without an Oven
Not everyone owns or wants to use an oven. This stovetop method is perfect for apartment dwellers, students, or anyone looking for quick, oven-free baking.
The Magic of No-Oven Bread: Ingredients You Need
This recipe requires just three basic ingredients:
- 5 cups of flour
- 2 cups of warm milk
- 1 cup of oil
That’s it! Simple pantry staples you probably already have. Let’s break down why these ingredients work so well together:
- Flour: The backbone of any bread. It provides structure and texture. Using all-purpose flour works beautifully, but you can experiment with bread flour or whole wheat for different results.
- Warm Milk: Adds moisture and richness, making the bread soft and tender. The warmth activates the gluten and helps the dough come together nicely.
- Oil: Keeps the bread moist and adds tenderness. It also prevents the dough from sticking and helps create a pleasant crust when cooked on the stovetop.
Step-By-Step Guide: How to Make This No-Oven Bread
Step 1: Preparing Your Dough
Start by combining your dry and wet ingredients:
- In a large mixing bowl, add 5 cups of flour.
- Slowly pour in 2 cups of warm milk while stirring continuously. Warm milk is crucial — too hot will kill any yeast you might add later (optional), and too cold won’t activate the gluten properly.
- Add 1 cup of oil (vegetable oil, olive oil, or any neutral oil).
- Mix the ingredients together with a spoon or your hands until the dough starts forming.
Step 2: Kneading the Dough
Kneading develops gluten, which gives bread its structure and chewiness.
- Flour your surface lightly and transfer the dough out of the bowl.
- Knead the dough for about 8-10 minutes. Press the dough with the heel of your palm, fold it over, and repeat.
- If the dough feels sticky, sprinkle a little flour, but be careful not to add too much — the dough should be slightly tacky but manageable.
Step 3: Let the Dough Rest
Cover the dough with a clean kitchen towel or plastic wrap and let it rest for about 30-45 minutes. This resting period allows the dough to relax and makes it easier to work with.
Note: This recipe doesn’t require yeast for rising, so the dough won’t puff up like traditional bread dough. However, this no-yeast bread is dense, soft, and delicious, perfect for those craving fresh homemade bread quickly.
Step 4: Cooking the Bread on the Stovetop
Here’s where the magic happens — no oven needed!
- Heat a large, heavy-bottomed skillet or non-stick pan over medium-low heat.
- Divide the dough into portions (depending on how big or thick you want your bread). You can make 6 to 8 medium-sized flatbreads or fewer large ones.
- Flatten each portion gently with your hands or a rolling pin to about ½ inch thick.
- Place the flattened dough carefully into the hot pan. Cover with a lid to trap steam — this helps cook the bread evenly inside.
- Cook for about 5-7 minutes on one side. Then flip and cook the other side for another 5-7 minutes. Adjust heat as necessary to prevent burning.
- Repeat with the remaining dough portions.
Step 5: Enjoy Your Homemade No-Oven Bread
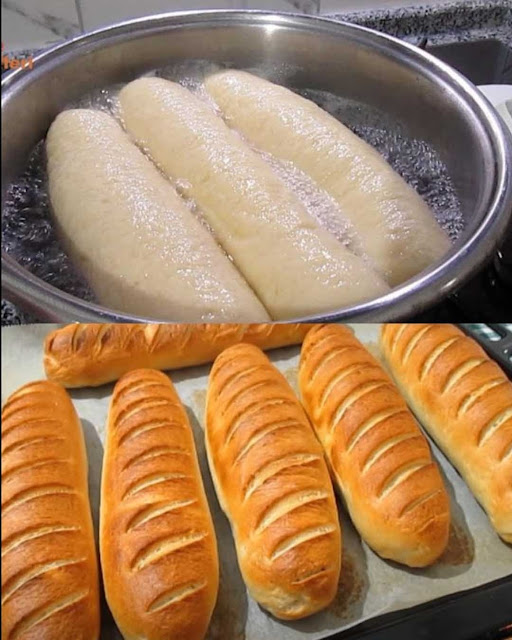
The bread will have a beautiful golden crust on both sides, soft inside, and a slightly chewy texture. Serve it warm with butter, honey, jam, or your favorite sandwich fillings.
Tips to Make Your No-Oven Bread Even Better
- Add herbs and spices: Incorporate chopped rosemary, thyme, garlic powder, or chili flakes into the dough for extra flavor.
- Use different oils: Olive oil will give a richer, slightly fruity taste. Coconut oil adds a subtle sweetness.
- Add seeds or nuts: Mix in flaxseeds, sesame seeds, or chopped walnuts for crunch and nutrition.
- Sweeten it up: For a sweeter bread, add a tablespoon or two of sugar or honey to the dough.
- Make it gluten-free: Use a gluten-free flour blend and add a binding agent like xanthan gum for texture.
How This Bread Fits Into Your Daily Life
Breakfast
click page 2 to continue