In the rhythm of everyday life, convenience has become more than just a preference—it’s a necessity. Amid all the appliances that power modern households, your front-loading washing machine stands out as one of the most essential tools for maintaining hygiene, comfort, and cleanliness. But what happens when this dependable appliance becomes the source of unpleasant odors, lackluster cleaning, and potential damage to your clothes?
Here’s the truth: regular cleaning of your front-load washing machine is not optional—it’s critical.
This simple yet transformative cleaning hack using common household items like white vinegar and baking soda isn’t just about maintaining appearances. It’s about preserving appliance efficiency, reducing energy consumption, extending machine lifespan, and ensuring your laundry stays fresh, clean, and bacteria-free.
In this comprehensive, step-by-step guide, you’ll learn everything you need to know to turn your grimy washing machine into a pristine powerhouse—without harsh chemicals or expensive maintenance services. Whether you’re dealing with stubborn mold, accumulated soap scum, or just want to maintain peak performance, this article will become your go-to resource for optimal washer care.
Why You Must Clean Your Front-Loading Washing Machine Regularly
Before diving into the detailed cleaning method, it’s vital to understand why this task is so important—and what’s at stake if you neglect it.
1. Avoid Expensive Repairs and Early Replacement
A buildup of soap scum, limescale, and mold can compromise the mechanical components of your washer, especially the internal drainage and pump systems. This can lead to:
- Sensor errors
- Drainage problems
- Motor strain
- Drum imbalance
These issues often result in service calls or, worse, costly replacement of the unit. Keeping your washer clean is one of the easiest ways to protect your investment.
2. Improve Energy Efficiency
When debris and residues build up, your washing machine has to work harder to clean clothes. That means longer cycles, higher water usage, and increased electricity consumption—all of which can dramatically increase your monthly utility bills. A clean washer runs more efficiently, helping you save money over time.
3. Protect Your Clothing and Skin
Unclean machines can harbor bacteria, mold spores, and detergent residues that get redeposited onto clothing. These irritants can lead to:
- Allergic reactions
- Skin irritation
- Unpleasant odors in your clothes, especially towels and workout gear
Cleaning your machine ensures that every laundry cycle genuinely leaves your clothes cleaner, not just superficially rinsed.
4. Eliminate Foul Odors at the Source
That musty, sour smell you notice when opening the washer door? It’s not your imagination. It’s likely caused by microbial growth, detergent buildup, and lingering moisture—all festering in the rubber gasket, drum, and drainage pipes.
Routine cleaning with vinegar and baking soda helps neutralize these smells and restore a fresh, clean scent to your laundry room.
Materials Checklist
Make sure you have everything ready before starting. You likely already have most of these items at home:
- White vinegar – 4 cups (946 mL)
- Baking soda – ½ cup (120 g)
- Microfiber cloths – 2–3 clean cloths
- Old toothbrush or soft cleaning brush
- Spray bottle – Optional (16 oz/473 mL capacity recommended)
- Mixing bowl – Optional (2-cup/473 mL capacity)
- Gloves – Optional (useful for sensitive skin)
- Measuring cup – At least 2-cup (473 mL) capacity
The Full Step-by-Step Deep Cleaning Process
Step 1: Mix the Vinegar Solution
In a spray bottle or bowl, mix:
- 2 cups of white vinegar
- 2 cups of water
Shake gently if using a spray bottle to combine thoroughly. This solution is your multi-purpose cleaning agent for both internal and external washer components.
Step 2: Clean the Exterior
Start by cleaning the outside of your machine:
- Dampen a microfiber cloth with the vinegar solution.
- Wipe down the front panel, sides, top, and especially around the control buttons.
- Dry with another microfiber cloth to avoid streaking.
This not only keeps your machine looking new but also removes oils, lint, and dirt buildup.
Step 3: Remove and Clean the Detergent Drawer
- Slide out the detergent drawer (refer to your user manual if needed).
- Dip an old toothbrush in the vinegar solution and scrub each compartment.
- Rinse thoroughly under hot running water for 1–2 minutes.
- Dry with a microfiber cloth and set aside.
This step prevents detergent and fabric softener residues from clogging the system and ensures accurate dispensing.
Step 4: Scrub the Door Seal
The rubber gasket around the door is notorious for harboring mold and grime.
- Gently pull back the seal to inspect for dirt and mildew.
- Soak a microfiber cloth in the vinegar solution and scrub all around the seal.
- Use the toothbrush to reach deep crevices where mold and debris collect.
- Wipe again with a clean cloth and leave the door open to dry.
This is a critical step to eliminate hidden bacteria and odor sources.
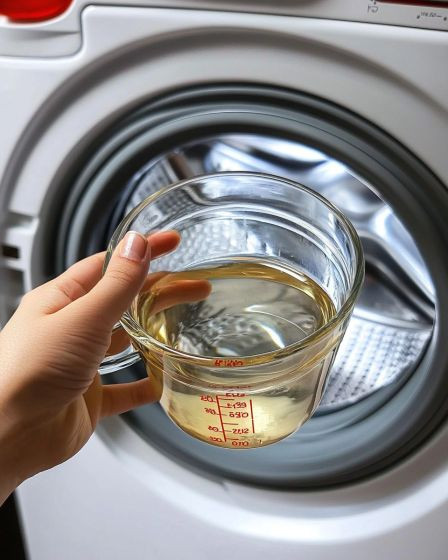
Step 5: Run a Hot Vinegar Cleaning Cycle
- Pour 2 cups of white vinegar into the detergent drawer.
- Set the washer to its hottest setting (at least 140°F/60°C).
- Run a complete wash cycle with no clothes inside.
This process kills bacteria, breaks down buildup, and flushes the system from the inside.
Click page 2 for more