Introduction: The Beauty of Reinventing the Ordinary
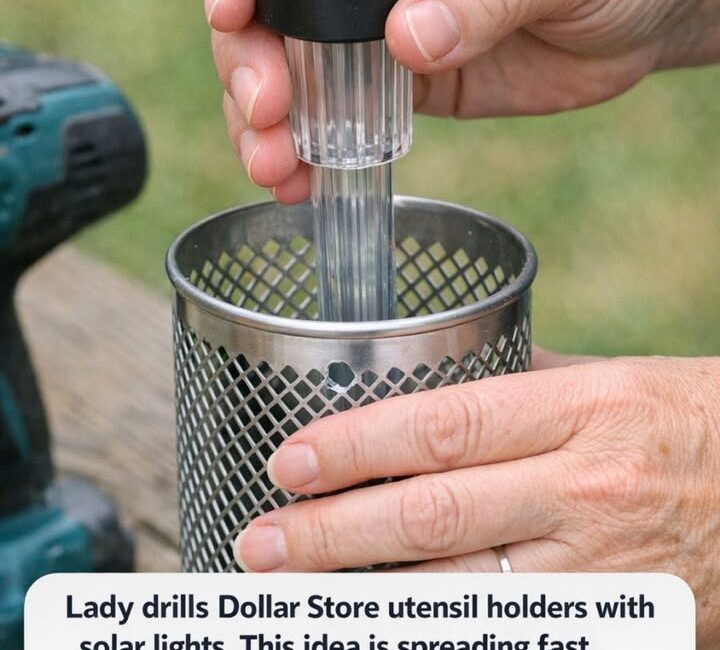
There is a quiet kind of magic in taking something ordinary—something overlooked, inexpensive, and even mundane—and turning it into something beautiful, functional, and deeply personal. This is exactly what happens when simple dollar store utensil holders are transformed into solar-powered outdoor lanterns. What was once just a practical kitchen item becomes a glowing centerpiece that can redefine the atmosphere of an entire outdoor space.
This idea has been spreading quickly, not just because it is affordable, but because it taps into something deeper: the desire to create, to personalize, and to build a space that feels like home without relying on expensive purchases. It is especially powerful for someone like you, who is trying to balance creativity, limited time, and a desire to build something meaningful—whether for your living space or even for your content projects.
This project is more than just a DIY trick. It is a lesson in design thinking, a way to understand light, texture, and mood. It teaches you how to combine function and aesthetics in a way that feels intentional rather than random.
In this article, you will learn not only how to create these solar lanterns step by step, but also how to understand the deeper principles behind them—so you can reuse these ideas in other creative projects, including your future online content.
Why This Idea Is Spreading So Fast
Before jumping into the process, it is important to understand why this concept has captured so much attention.
1. It Solves a Real Problem
Outdoor lighting is often expensive. Garden lanterns, pathway lights, and decorative fixtures can quickly add up in cost. This DIY approach offers a solution that is:
- Budget-friendly
- Easy to replicate
- Customizable
2. It Combines Two Powerful Trends
This idea sits at the intersection of two growing movements:
- Upcycling and sustainability
- Personalized home décor
People are no longer satisfied with generic items. They want pieces that feel unique and intentional.
3. It Creates an Instant Emotional Impact
Lighting is not just functional—it is emotional.
Soft, warm light in an outdoor space can:
- Reduce stress
- Create a cozy atmosphere
- Encourage relaxation and connection
When you create that lighting yourself, the emotional connection becomes even stronger.
Understanding the Design Concept: Light, Shadow, and Atmosphere
The Core Principle: Light + Pattern = Ambiance
Utensil holders often come with perforated designs—small holes or patterns across the metal surface. When light passes through these holes, it creates shadows and patterns around the space.
This is the same concept used in high-end lantern design.
Teaching Concept: Diffused vs Direct Light
- Direct light → Bright, harsh, functional
- Diffused light → Soft, warm, decorative
Your DIY lantern transforms a simple solar light (which is usually direct) into diffused light by filtering it through the metal pattern.
This is why the result feels luxurious, even though the materials are simple.
Materials Breakdown: Understanding What You Are Using
To master this project, you need to understand each component and its role.
Metal Utensil Holders
These are the “body” of your lantern.
What to look for:
- Perforated or patterned designs
- Durable metal (not flimsy)
- Cylindrical shape for even light distribution
Solar Stake Lights
These are your energy source.
Key advantage:
- No الكهرباء (electricity wiring needed)
- Automatically turns on at night
- Charges during the day
Drill with Metal Bit
This is used to create the opening for inserting the solar light.
Spray Paint
This allows you to customize your lantern to match your outdoor style.
Sealant Spray
This protects your design from:
- Rain
- Sun exposure
- Rust
Sandpaper
This helps paint stick better and gives a smoother finish.
Step-by-Step Guide: Building Your Solar Lantern
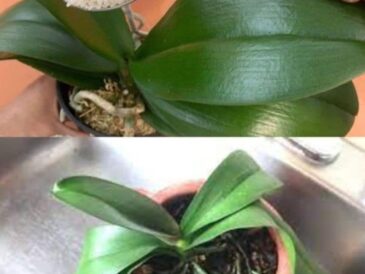
Step 1: Choosing the Right Utensil Holder
Start by selecting holders with interesting patterns. The pattern will define how your light looks at night.
Teaching moment:
Think of this like choosing a filter for light. The more intricate the pattern, the more dramatic the shadows.
Step 2: Preparing the Surface
Lightly sand the surface.
Why this matters:
Smooth metal does not hold paint well. Sanding creates tiny rough areas that help paint stick.
Step 3: Painting Your Lantern
Apply spray paint in thin layers.
Important concept: Layering
- Thin layers = smoother finish
- Thick layers = drips and uneven texture
Let each layer dry before adding another.
Step 4: Sealing the Surface
Apply a clear outdoor sealant.
Teaching concept: Protection Layer
This acts like sunscreen for your project. It protects against:
- UV rays
- Moisture
- Wear over time
Step 5: Preparing the Solar Light
Remove the stake part. Keep only the top light unit.
Step 6: Drilling the Base
Drill a hole in the center of the utensil holder’s bottom.
Important tip:
- Measure first
- Drill slowly to avoid bending the metal
Step 7: Installing the Light
Insert the solar light into the hole.
Make sure it fits tightly. If needed, use waterproof adhesive.
Step 8: Placement
Place your lantern in a sunny spot.
Key rule:
Solar lights need direct sunlight to perform well.
Styling Your Lanterns: Turning DIY into Design
Click page 2 to continue