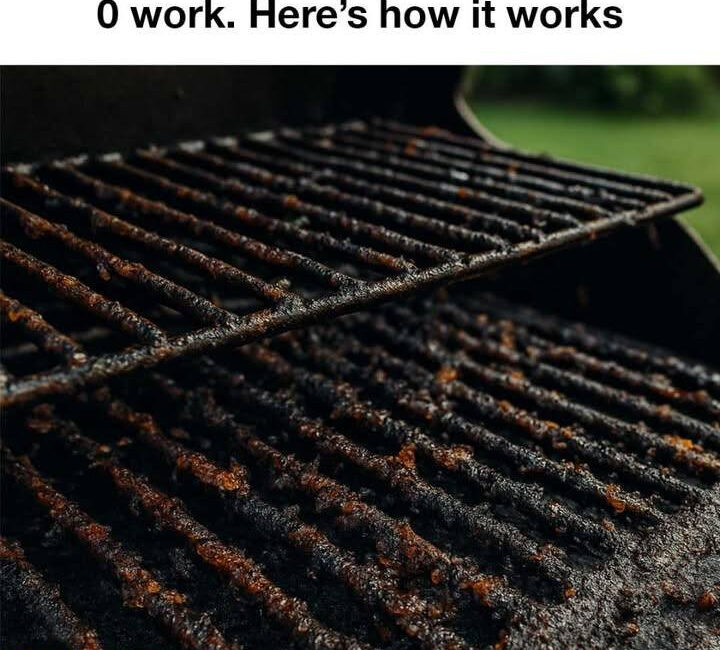
Issue: If you skip the final light oiling/seasoning step, food may stick or flavours may be compromised.
Solution: After removing foil and residue, apply a light layer of cooking oil to the warm bars before food next time.
How This Hack Saves Time, Money & Improves Performance
Let’s quantify and qualify how this method benefits you.
Time savings
Traditional cleaning methods can take 30‑60 minutes or more: cooling grill, scrubbing, soaking, drying.
This hack takes approximately four minutes plus handling time—so under ten minutes. You effectively shift cleaning to a near “zero‑effort” step routine. The fewer minutes you spend cleaning, the more you can spend cooking or entertaining.
Cost savings
- Less reliance on specialised grill brushes (which may cost $10‑20 or more).
- Fewer chemical degreasers or foaming cleaners (costing perhaps $5‑15 each).
- Less wear and tear on your grill surface, so potentially longer equipment life (which may avoid replacement grills sooner).
- Improved cooking performance means less wasted food or uneven cooking (savings from better heat transfer and clean grates).
Performance improvement
- Cleaner grates mean better heat conduction, more even cooking, fewer flare‑ups from old grease.
- Better flavour: old burnt residues can impart unpleasant smoky flavours; cleaning them off improves taste.
- Safer: old buildup can harbour bacteria or cause unexpected flare‑ups; the high heat + cleaning step offers some sanitisation.
- Easier future cleaning: when you maintain regularly, cleaning becomes easier each time (build‑up is less deep).
Environmental & safety benefits
- Avoids harsh chemicals which might release fumes, residues or need disposal.
- Aluminium foil used is minimal, and where recyclable, adds less waste compared with frequent chemical sprays and plastic paddles.
- Reduced scrubbing means less risk of accidents, less fatigue, less damage to surfaces (thus safer for grill longevity).
FAQ: Frequently Asked Questions About This Hack
Here are answers to common questions and concerns people often have when discovering this method.
Q: Can I use this hack on any type of grill?
A: Yes, broadly speaking. It works on gas grills, charcoal grills, electric grills—provided you can reach a high temperature and have a lid (or suitable enclosed space). For open grills without lids, you may need to adapt (e.g., run high heat with foil for a section at a time). Always ensure your grill’s design allows safe temperature rise and foil placement.
Q: Is it safe to put aluminium foil directly on hot grates?
A: Yes, generally. Aluminium foil is heat‑resistant for typical grill temperatures. Ensure you use heavy‑duty foil and place it properly. Be cautious around burner vents, gas jets, etc. Avoid foil covering places not designed for full contact or blocking ventilation. Always handle hot foil with gloves.
Q: Will this damage my grill grates or coating over time?
A: When used properly, no. High quality grates can endure this method. But avoid over‑doing it (e.g., leaving foil on much longer than recommended or repeated daily without inspection). Also ensure your grill is well maintained; the method is part of maintenance, not the sole cleaning step.
Q: What about stubborn gunk or very old buildup?
A: For heavy or neglected buildup, this hack alone may not suffice. You may need an initial “deep clean” manually (scrape, remove grates, degrease) and then shift into the four‑minute maintenance routine. The key is regular use of the quick method so gunk doesn’t accumulate in the first place.
Q: How often should I use it?
A: Ideally: each time you finish cooking (while the grill is still hot) apply the foil hack before food cool‑down and sticky residue hardens. At a minimum, use before each major cook or whenever you see visible residue. Complement with periodic deeper inspections.
Q: Do I still need to oil the grill after?
A: Yes. After removing foil and residue, a quick light oiling or seasoning stroke on the warm bars is recommended. It helps prevent food sticking, reduces the chance of flare‑ups, and improves subsequent cooking performance.
Q: Is the four‑minute time fixed?
A: Four minutes is the recommended sweet spot for standard moderate buildup on a typical grill. If your buildup is mild, you may get away with less; if heavy, you may extend to five or six minutes—but do so cautiously. Always follow manufacturer safety guidelines.
How to Make This Hack Part of Your Routine Without Thinking About It
Turning this into an effortless habit makes your grilling life easier and the clean‑up almost invisible. Here’s how to embed it.
Make it automatic
- After you finish grilling, before you shut the lid for storage, tear off that foil piece as part of your “end‑session” checklist.
- Keep foil rolls near your grill so there’s no barrier to action. Have gloves/tongs ready.
- Post‑grill, while people are still enjoying food or you’re cleaning plates, sneak in the foil step—four minutes is enough to step away, do it, and return.
Visual prompt
- Put a visible foil roll near the grill. The visual cue triggers the routine.
- Alternatively, place a small label or sticky note near the grill controls: “Foil on grates – 4 min – remove”.
Combine with other simple tasks
- At the same time as you apply foil, check drip tray and empty if needed.
- While foil is working, you can wipe side shelves, clean plates, prep salads—multi‑tasking uses the four minutes productively rather than stand idle.
Track results
- After a month or two of this routine, compare how much gunk builds up compared to your earlier habit of “scrub once every few months.” You’ll likely see drastic difference.
- Use that positive reinforcement to continue habit.
Adapt to seasons
- In colder months or less frequent grilling, you might run the heat and foil method before first use of season.
- In heavy grilling season, you may use foil after each session or at least after major ones.
Extra Tips & Pro Enhancements
For even better results, here are additional tricks you can layer in.
- Use heavy‑duty foil: A thicker “premium” foil may hold up better during high heat and handle residue better.
- Rotate foil pieces: To avoid tearing or risk of bits getting stuck, use a fresh sheet each time or ensure the foil remains intact when removing.
- Match foil size to grill area: If you grill only half the surface for a cook, you might place foil only in used zone—but ensure any zone with residue is covered.
- Combine with a light scrub occasionally: Every 4‑6 uses, still use a wool/wire brush or foil‑ball scrub to catch edge residue.
- Monitor grate condition: Over time, metal bars may degrade; keep an eye on rust or coating loss and address it. The foil hack helps reduce wear, but doesn’t eliminate need for periodic maintenance.
- Season your grates: After cleaning, when they’re warm, apply a thin coat of cooking oil and let heat for a minute—this helps protect the surface and makes future cleaning easier.
- Mind flare‑ups: Ensure residue doesn’t drip into burner areas or cause flame spikes. The foil hack helps limit dripping residue but check the interior drip pan regularly.
- For cast‑iron or porcelain coated grates: Be gentle in removal and oiling to preserve coating; do not overheat or leave foil too long against coated surfaces repeatedly.
Why Grandma’s Hack Beats Many “Brush & Spray” Methods
Let’s compare this hack against more traditional cleaning routines and why many people prefer it.
Brush & spray approach
Typical routine: after cooking, you wait for grill to cool (or partially), then use a wire brush or bristle brush to scrub the grates, maybe apply chemical degreaser, wipe down, oil bars, etc. Pros: thorough. Cons: time‑consuming, risk of wire bristles breaking off (food safety), may leave chemical residue, frequent manual effort.
Foil‑and‑heat approach
The hack: use heat + foil; four minutes; minimal effort. Pros: fast, minimal tools, less manual scrubbing, fewer chemicals, less downtime before next cook, easier to integrate. Cons: may not replace full deep clean in very neglected grills, care needed to not overheat or misuse.
For many grill users, especially those who grill frequently and want low‑hassle maintenance, the foil hack is superior. It doesn’t fully eliminate deeper cleaning, but it dramatically reduces how often you need heavy scrubbing.
Final Thoughts
If you’ve ever said, “Ugh—I don’t want to spend 30 minutes scrubbing the grill each time,” this method is for you. The simple concept that your nana taught may seem almost too good to be true—but when done right, it frees you from the cleaning dread and keeps your grill performing at its best.
To recap: heat your grill, cover the grate with foil, wait four minutes, remove and dispose of the foil (with residue). Do a light reset if needed, oil lightly, and you’re ready for the next cook. Do this regularly, and you’ll avoid heavy build‑up, protect your grill, save time and keep your food tasting great.
Make this part of your grilling routine, and you’ll likely look back on those old “hour of scrubbing” days and smile. Your next barbecue just got easier, cleaner and more efficient.