Before we dive into the how‑to, it’s useful to understand why this hack is so effective. That way you’ll appreciate how the physics and chemistry of the grill meet the method, and you’ll be more likely to use it correctly (and consistently).
The problem of grill gunk
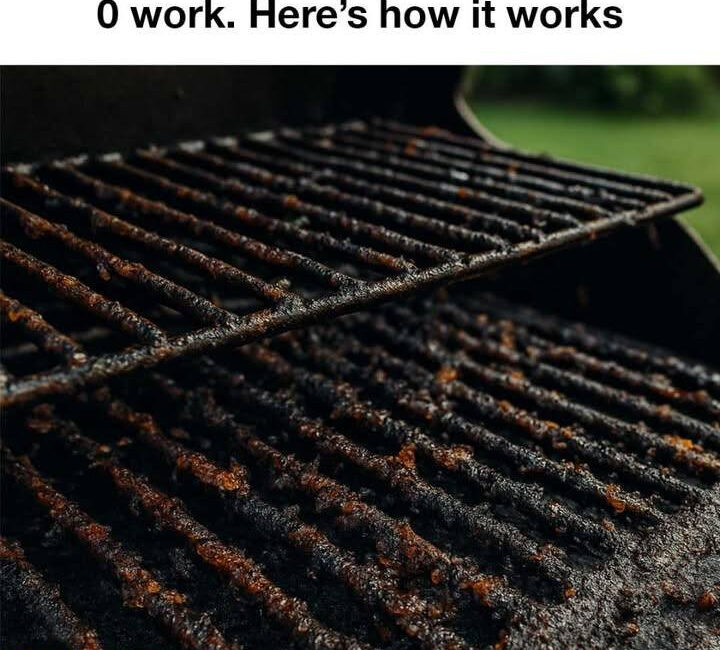
If you’re like many grill‑owners, you’ve experienced it: after cooking steaks, burgers, veggies or whatever, the grill grates accumulate a layer of burnt‑on food, grease, marinade residue and carbonised particles. Over time this “gunk” builds up:
- It can affect flavour (off‑tastes, smoke, flare‑ups).
- It can reduce heat efficiency and even cause uneven cooking.
- It may be unsanitary (static food debris, charred residue) and harder to remove later.
- Traditional cleaning methods (wire brushes, soaking, chemical sprays) take time, effort and sometimes damage the grill surface or leave residues.
The genius of the hack
The hack relies on two core principles:
- High heat + time short: By heating the grill to a very high temperature and holding it for a brief period, you cause the burnt grease and food particles to break down, become brittle, ash‑like or loosening from the surface. Heat is the “loosen” mechanism.
- Aluminium foil trap or barrier: The foil acts as a barrier or trap layer on the grates:
- It touches the grates and the high heat transfers through the foil, distributing evenly.
- The residue ash or loosened gunk falls away from the actual grate surface onto or under the foil, or is prevented from re‑adhering.
- It allows you to remove the foil (and the residue with it) rather than scrubbing the grates directly.
Combined, these two mean you skip the intense scrubbing, you avoid heavy chemical degreasers, and you use the existing heat of your grill (which you already had if you just finished cooking) to effect the cleaning. Efficient.
Why the “zero work” claim is not entirely hyperbole
- You don’t have to scrub bars, you don’t need wire brushes, you don’t need soaking.
- The “work” is simply heating and placing foil, then removing it.
- Because you use high heat, the gunk is loosened rather than “scraped off manually.”
- The method uses minimal tools/materials (foil, gloves/tongs) and minimal time (about 4 minutes).
What makes it different from other grill‑cleaning routines
Many grill cleaning methods require:
- Cooling the grill, then scraping with brushes.
- Chemical degreasing sprays, scrubbing, rinsing, drying.
- Dismantling grates and soaking.
This method flips the sequence: you clean while the grill residual heat is still present (or you bring it up again), and you minimise manual force.
Now let’s walk through exactly how to do it, with full details.
Step‑by‑Step Guide: The Easy Grandma Hack in Detail
Here is the full detailed process—so you can replicate it and get the same fast result, safely and efficiently. You’ll also see variations for different grill types (gas, charcoal, electric). Follow each step carefully.
Materials & Preparation
What you’ll need:
- Heavy‑duty aluminium foil (a standard roll is fine).
- Heat‑resistant gloves or long tongs (to handle hot surfaces or foil safely).
- A grill with lid (gas, charcoal or electric). The method works best when the grill can achieve high temperatures and the lid can be closed.
- Optional: a grill grate brush (for occasional deeper clean) or a fine wire mesh for checking.
- Ensure you have space nearby to safely place hot foil or disposal container.
Pre‑Check:
- Make sure the grill is clean enough to be used safely (no large chunks of debris around burners).
- Ensure the grill vents and burner systems are functioning if gas or charcoal; you don’t want flare‑ups or uncontrolled combustion.
- If you just finished cooking and the grill is still hot, you’re in a perfect state to apply this hack. If the grill is cold, you’ll need to bring it up to temperature anyway.
- Have the foil ready—tear off in advance a piece large enough to cover the grate area.
Step 1: Pre‑heat the Grill
- Turn on all burners (gas) or get a charcoal grill going such that the grate surface will reach high heat—ideally around 500 °F (260 °C) or higher (depending on grill design).
- Close the lid while heating, let the grill reach that temperature and hold for a couple of minutes until it is hot and stable.
- Why: The high heat loosens burnt residue, causes grease to partially ignite or ash out, and renders grime brittle. The lid ensures airflow and consistent heating across the grate.
Step 2: Apply the Aluminium Foil
- Tear off a sheet of aluminium foil large enough to cover the grate surface completely or at least the major cooking area.
- Lay the foil flat over the grates. Make sure it’s in contact with bars so that heat conduction works well. The foil should cover as much of the grate as possible so residue doesn’t escape around edges.
- If the grill is still hot, be very careful with tongs or gloves when handling the foil, since it will quickly heat up.
Step 3: Close the Lid and Wait (~4 Minutes)
- Close the grill lid and let it run at high heat for four minutes.
- During this time:
- The extreme heat acts on the burnt‑on gunk on the grate bars underneath the foil.
- The foil conducts heat and essentially becomes part of the surface, causing the residue to ash, loosen or burn-off.
- The foil traps the residue ash, prevents re‑adhesion, and protects the grate surface while the finish loosens.
- Note: You must monitor the time. The four‑minute target is optimal: long enough to loosen the grime, short enough to not damage the grill hardware or excessively heat parts. Some users may allow five minutes if buildup is heavy, but repeated over‑heating may degrade surfaces.
Step 4: Remove Foil & Inspect
- After four minutes turn off the burners or safely extinguish the fuel source (charcoal). Let the grill remain closed for maybe 30 seconds to stabilise. Then open the lid carefully (watch for flare or heat).
- Using heat‑resistant gloves or long tongs, carefully remove the foil sheet. It will be hot—treat it like a hot cookie tray. Place it on a safe surface or discard as needed. The foil will carry ash and debris from the grate.
- With the foil removed, inspect the grates. Many times you will find: a large portion of loosened residue has come off; the bars look visibly cleaner; charred grit is reduced; major manual scraping is avoided.
Step 5: Optional Light Scrape & Final Prep
- For best results, especially if the grill has heavier buildup, use long‑handled tongs or a silicone scraper to quickly and lightly remove any remaining ash or residue. But this will take a fraction of the effort compared to full scrubbing.
- Then wipe the grate bars quickly with a lightly oiled rag while warm (or apply a drop of cooking oil and drag a cloth through). This re‑seasons the bars and creates a fresh protective film.
- When the grill is cooled or at cooking temperature again, you’re ready to place food on a cleaner surface.
Step 6: Safe Disposal & Final Checks
- Properly dispose of the used foil (if heavily soiled, may be considered hot ash; handle safely).
- Ensure no foil shards remain in or around the grate that might affect cooking.
- Optionally, perform a quick “burn‑in” by heating for a minute with lid closed to ensure no leftover chemicals or foil residue remain before cooking food.
Why It Only Takes Four Minutes: The Science Behind the Shortcut
Let’s break down why exactly the four‑minute timeframe works and how the materials and conditions interplay.
Heat + time = residue breakdown
When you run the grill at high temperature (500 °F or so), several things happen:
- The grease and food marinade residues baked onto bars reach temperatures where they begin to char further, degrade, and convert to ash or brittle forms.
- The heat loosens adhesion between the gunk and the metal grate.
- The hot metal causes oxidation and partial burning of carbon‑rich residues, making them easier to remove.
The four‑minute window is sufficient for many common levels of buildup (especially if you clean regularly). If you waited for weeks without cleaning, you might need slightly more—but consistent use means fewer manual scrubs.
Aluminium foil as conductive barrier/trap
Foil is thin, conductive, conforming. When placed over the grate, it becomes a heat transfer medium. The residue underneath experiences the full heat of the grill through the foil. The foil also isolates the residue somewhat, preventing it from splattering onto food, and gives you an easy removal vehicle. You are essentially letting the grill “self‑clean” using its heat, and then removing the result by swapping the foil.
Minimal mechanical force required
Because the heat does most of the work, your “work” is just placing the foil and removing it. The tough job of detaching gunk is done thermally, not manually. That’s why the “zero work” claim holds in practical terms.
Safety & resource efficiency
- You don’t need chemical degreasers that may leave residues, require ventilation, or risk affecting taste of future grilled food.
- You make use of the grill’s existing heat, so no extra tools or brushes or long soak time.
- Since you clean while the grill is still hot or triggered by cooking, you avoid waiting for it to cool down and then pulling bars out.
Variations and Adaptations for Different Grill Types
While the method described is widely applicable, you’ll want to adjust slightly depending on your grill type, maintenance history and frequency of cleaning. Below are variants and guidelines.
Gas grill
- Gas grills with lids and burner control are ideal for this method.
- Pre‑heat: turn all burners to “high,” lid closed until you reach high temperature.
- Use foil once the burners are hot and stable.
- After foil removal, consider turning burners low and letting grill burn off any foil debris.
- If you’ve got heavy built‑up residue or crust, you may combine with light brushing after foil method every few uses.
Charcoal grill
- Charcoal grills may not reach exactly 500 °F everywhere but you can get close.
- After cooking, leave the charcoal lit or add fresh coals to raise heat, place the foil or heavy sheet across the grate and close lid for 4 minutes.
- Remove foil carefully and ensure charcoal ash and residue are contained.
- If charcoal is near end of life, you may simply run hot coals, foil method, then discard ash and replace coals next session.
Electric or kettle grills
- Electric grills with lids can still use this method—pre‑heat fully, apply foil, hold for four minutes.
- For kettle grills (no lid) you might need to use a high temperature with lid open or place foil under the grate (if safe) or use a smaller section of grate at a time. The key is heat + contact + foil barrier.
Mildly neglected grills
- If your grill has very heavy carbon buildup (weeks/months), you may need to first remove large chunks manually, then apply the foil method as a maintenance step afterwards.
- In those cases you could extend the foil time to 5‑6 minutes, but be cautious of overheating other parts. Consider doing the heavy build‑up removal less often and using the four‑minute method for regular maintenance.
Maintenance Schedule: Turn This Into Routine and Extend Grill Life
Here’s how to integrate this hack into your grilling routine so you keep your grill in top shape, avoid the dreaded “really nasty cleanup” cycle, and preserve heating performance and flavour.
After every grilling session
- Within 15‑30 minutes after cooking (while the grill is still warm), apply the foil hack. It’s quick, so you’re more likely to do it immediately rather than procrastinate.
- Remove residue and foil.
- Lightly oil the grates for cooking next time.
Weekly or every few uses
- Check for any residual crust or ash still adhering. If present, use a light grate brush or balled foil to sweep those bits off.
- Check burners (gas) for any obstructions, check charcoal trays for ash buildup (charcoal grill) and clean out drip pans.
- Inspect side tables or surfaces around grill for spritzed grease or marinade splatter and wipe.
Monthly or at season start/end
- Deep inspect: remove grates and clean underneath where residue may have fallen.
- Perform more thorough cleaning of interior surfaces (lid underside, burner shields) if char buildup is crazy.
- Ensure the exterior is clean, vents clear, and all parts working.
- If you didn’t use foil method for some time (e.g., stored grill in winter), run the foil method before first use of season.
Use of the hack prolongs grill life
By regularly clearing the hot‑bar surface, you maintain more even heat transfer, reduce flare‑ups, and avoid corrosion or food‑flavour problems. The fewer times you have to resort to heavy scrubbing, the less wear you place on the metal surfaces, coatings and burners.
Common Mistakes & How to Avoid Them
Even with a simple method, users sometimes make errors that reduce effectiveness or create hazards. Here are pitfalls and corrective tips.
Mistake 1: Foil doesn’t cover enough of grate
Issue: If you use a small piece of foil that doesn’t touch or cover the entire grate, the heat won’t distribute evenly, and residue may remain.
Solution: Tear off a sheet that spans the width of the grate or large enough to cover cooking area. Push foil into contact with bars.
Mistake 2: Not enough heat / lid open
Issue: If the grill isn’t hot enough, or lid is left open, the residue won’t loosen properly; result: gunk remains.
Solution: Ensure you reach high temperature (500 °F or as high as your grill can safely go) with lid closed, for the four‑minute period.
Mistake 3: Leaving foil on too long or repeating too often
Issue: Extended foil coverage at high heat for too long repeatedly might cause damage to coating, affect metal integrity or cause excessive oxidation. Some grill‐makers warn about interfering with airflow or burning protective coatings.
Solution: Use the four‑minute guideline or maybe up to five in severe cases. Don’t use foil method every minute—use as part of maintenance, not constant.
Mistake 4: Removing foil poorly or leaving hot foil lying
Issue: Handling hot foil unsafely may cause burns or leave melted foil bits on surfaces.
Solution: Use heat‑resistant gloves or long tongs. Set aside a metal or safe surface to place hot foil once removed.
Mistake 5: Neglecting occasional deeper cleaning
Issue: If you rely only on this method forever and never do deeper cleaning, underlying buildup might accumulate under grates, burners or interior.
Solution: Combine this hack with a monthly or seasonal deeper clean: remove grates, check drip tray, check burner shields, wipe under surfaces.
Mistake 6: Cooking right away without a quick oiling
Click page 2 for more