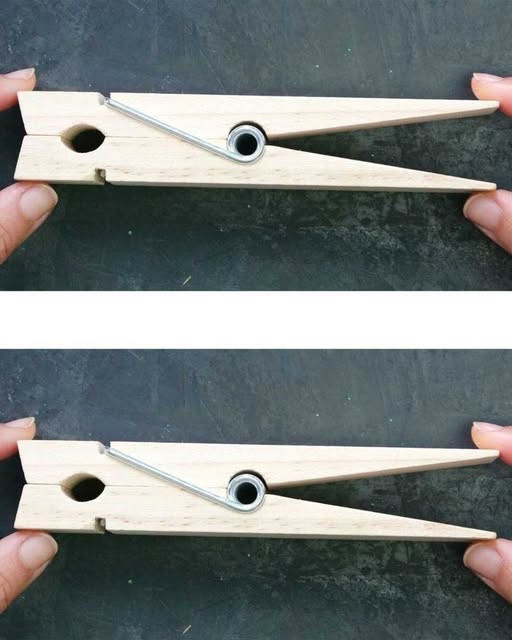
When we think of front door makeover — enhancing “curb appeal,” upgrading entryway aesthetics or giving that first impression some flair — many homeowners jump immediately to expensive materials: new doors, hardware, lighting, stone veneers, exotic plants. But there’s a charming, low-cost, high-creativity route little known: clothespins. Yes, those simple wooden or plastic clips you hang laundry with.
Clothespins are underutilized in home décor, especially outdoors. They offer:
- Versatility: you can paint them, clip them on, string them, decorate them in dozens of ways.
- Affordability: a box of clothespins is cheap, so the material cost is negligible.
- Ease of use & reversibility: you can clip, unclip, reconfigure without damaging your door.
- Lightweight: they minimally impact door weight or stress on hinges.
- Customization: shape, color, arrangement, extras (ribbons, fabric, mini flags) — you control the look.
If you bought clothespins from Walmart or any mass retailer (wood or sturdy plastic), you can repurpose them into decorative accents that enhance your door’s style, seasonal themes, or personalized statements. Below, you’ll find 7 genius ways—step by step, with design rationales, execution tips, and advanced variations—to transform your front door into something unique, eye-catching, and delightfully DIY.
Method 1: Clothespin Accent Border Frame
Idea: Use clothespins as decorative “teeth” or mini pegs around a rectangular door panel or door frame edge, creating a textured border.
Why it works: The pin shape adds repeating vertical accents, giving a playful “fence” or “crown molding” effect. It draws the eye, emphasizes the shape of the door, and adds visual interest without bulk.
Materials & Preparation
- A selection of clothespins (wood or plastic; ensure the spring is strong).
- Spray paint or acrylic paint (if you want colored accents).
- Painter’s tape or low-adhesive tape (to mask areas).
- Strong adhesive or mounting method (hot glue, exterior-grade epoxy, double-sided outdoor mounting tape).
- A ruler or spacing jig (to maintain even spacing).
- Clear sealer (optional) for weather protection.
Steps
- Dry layout
Before gluing anything, lay clothespins around the door panel or frame in your intended spacing (e.g. every 3–4 cm). Adjust so corners and proportions look balanced. - Paint / decorate clothespins (optional)
If you want colored accents (white, metallic, bold color), paint the clothespins before mounting. Do it in several light coats so you avoid drips or clouding. Let dry fully. - Mask door or frame edges
Use painter’s tape to mask portions of the door near areas you won’t attach, protecting surfaces from adhesive or paint overspray. - Attach clothespins
One by one, apply adhesive to the back face of each clothespin (or to the door edge). Press firmly and hold until secure (or use support blocks until cured). Keep consistent spacing. Use a spacing jig or ruler to maintain alignment. - Corners & special pieces
At corners, you may need to cut clothespins slightly (trim the tips) or use half pins. Alternatively, orient them differently to mitigate bulk. - Seal (optional)
Once adhesive cures and pins are stable, apply a light clear sealer (spray or brush) to protect wood from moisture, UV, and wear.
Design Tips & Variations
- Use alternating colors (e.g. white, then natural wood, then painted) to create a rhythm.
- Use metallic or gold-painted pins at the top or bottom as accent pieces.
- For a rustic look, leave the wood natural but apply a light stain or wash.
- Integrate mini LED string lights behind the pins (thread a thin light wire behind them) so each pin glows faintly at night.
- Combine with a secondary decorative strip (e.g. a thin trim or rope) to anchor the pins visually.
This creates a unique, tactile border that subtly enhances door geometry.
Method 2: Clip-On Seasonal / Holiday Swag Hanger
Idea: Use clothespins on a horizontal or vertical string (rope, wire, twine) across your door or door frame to clip seasonal decorations: small wreaths, tags, small garlands, decorative cutouts.
Why it’s powerful: You get flexibility to swap the décor per season (e.g. spring flowers, summer flags, fall leaves, holiday ornaments) with no permanent damage. The clothespins act as built-in hangers.
Materials
- Two anchor points (nails, hooks, adhesive hooks) installed at two sides of your door frame or facade.
- Twine, jute, transparent fishing line, or decorative rope (thin but strong).
- Clothespins spaced along the rope (pre‑painted or decorated).
- Seasonal small décor pieces (mini wreaths, paper cutouts, garlands, small signs).
- Optional: small beads or spacers between pins for aesthetic spacing.
Steps
- Install anchor hooks
Place hooks or nails at the two ends of your rope path (e.g. left and right sides of the door frame). Ensure the rope will be taut but not overly tight (so clips hang straight). - Attach rope / line
Tie or secure rope from one end to the other, leaving some slack so it doesn’t overstrain the structure. A slight downward bow is okay. - Clip clothespins
Clip pins at even intervals along the rope. If they’re paintable, coat them first. You might alternate with decorative spacers (wood beads, small shapes) between clips so decoration pieces don’t bunch. - Add seasonal items
Use the clothespins to clip lightweight décor: small wreaths, miniature signs, cutout shapes (paper, felt), garlands, postcards. Because clothespins grip, swapping items is easy. - Secure heavier items
If you hang something heavier (small planters, heavier adornments), add a string loop behind it and clip, or place a small adhesive reinforcement where the clip presses.
Design Ideas & Variations
- Holiday string: clip snowflake cutouts in winter, flower cutouts in spring, maple leaves in fall.
- Photo display: hang old family or nostalgic photos (in weather-safe sleeves) next to the main door as an entry statement.
- Inspirational quotes: clip small quote cards that rotate monthly.
- Welcome messages: clip a “Welcome” sign centrally with seasonal accents around it.
- Hanging plants: for very light succulent pods or air plants, clip mini planters (if weight allows).
- Light integration: weave a thin fairy light through rope so behind each clipped item there is gentle illumination.
Because you’re using clothespins as hangers, this method is “future‑proof” and adjustable with ease.
Method 3: Clothespin Mosaic or Door Panels
Idea: Create a decorative mosaic or pattern made of clothespins affixed in a radial, geometric, or abstract design on a surface panel that is then mounted on or adjacent to your front door.
Why it stands out: It converts everyday clips into art. It turns your door (or side panel) into a gallery piece with texture and pattern that actually integrates clothespins functionally into the design. It becomes a conversation piece.
Materials & Preparation
- A thin wooden board or plywood panel cut to size (same size as a door panel, or side panel).
- Clothespins (many — 100s depending on the design)
- Primer / base paint for the panel
- Adhesive (wood glue, epoxy)
- Optional: colored stain / paint for pins
- Clear top coat / sealer
- Mounting brackets or French cleat to attach the panel to the door or adjacent wall.
Steps
- Design your mosaic / pattern
Sketch a pattern: radial (sunburst), concentric circles, chevron, herringbone, diamond grid, or abstract. Consider the shape and size of clothespins (width, length) in mapping the pattern. - Prepare panel base
Prime or paint the panel in a base color (e.g. dark or neutral) which will show through gaps. Let it dry. - Paint / stain clothespins (optional)
If doing a multicolor design, paint some pins in accent colors. Let dry completely. - Lay out clothespins dry
Without gluing, arrange them on the panel in the planned pattern to test spacing and fit. Adjust gaps, overlap, orientation. - Attach pins
Working section by section, apply adhesive to the end and/or side of each pin and press it to the panel, holding until secure or using small clamps. Maintain even spacing. Work outward or inward depending on pattern. - Fill minor gaps
If small gaps remain, insert trimmed wood slats or filler strip or small decorative inlays. - Seal with clear top coat
Once adhesive is cured, apply a clear weather-resistant sealer coat across the entire surface to protect wood and pins from moisture and UV. - Mount panel
Use mounting cleats or brackets to mount the piece beside or on your door (if structurally safe). Avoid interfering with door movement. Ensure anchorage supports weight.
Design Enhancements & Ideas
- Use gradient color: pins at bottom shade darker, pins at top lighter, creating an ombré effect.
- Alternate pin orientations (clip open, clip closed, vertical, horizontal) to create texture.
- Incorporate metal or acrylic inlays between pin clusters for contrast.
- For 3D effect, stack two layers of clothespins so that some protrude.
- Backlight the panel slightly (LED strip behind) so edges cast soft shadows at night.
This method turns clothespins into architectural accents—a bold statement.
Method 4: Functional Clip & Message Board on the Door
Idea: Use clothespins mounted or clipped on the door to form a message / reminder board — clip mails, notes, seasonal flyers, grocery lists, or decorative tags.
Why it’s practical: It gives purpose beyond decoration. The clothespin board becomes both functional and decorative, integrating form and function. It’s especially useful for households where messages or reminders are common at the entry.
Materials
- A backing board (thin wood or MDF) sized to a panel on your door
- Clothespins mounted across the board (horizontal rows, offset columns)
- Adhesive or small finishing nails
- Magnetic paint (optional) or chalkboard paint behind pins
- Clear sealer or top coat
- Mounting hardware (mounting strips or screws)
Steps
- Cut and paint backing board
Size it to fit a door panel or inset region. Use a painted finish or chalkboard paint for extra function. Let dry. - Mount clothespins
Mount rows of pins across the board, clipped open outward so that you can clip items in. Use adhesive or tiny finishing nails behind the spring hinge so the clip can open. Maintain consistent spacing. - Seal and finish
Lightly coat with sealer, being careful not to fill the clip jaws. - Mount to door
Secure the board to the door with screws or adhesive mounting strips (ensuring it does not interfere with door operation). - Start clipping
Use it to clip mail, notes, flyers, kids’ artwork, coupons, reminders, decorative seasonal tags, motivational quotes, or key cards.
Ideas and Enhancements
- Use chalkboard or wipe board paint behind the pins so you can write notes (e.g. “Welcome guests”, “Don’t forget umbrella”).
- Add a magnetic strip below so pins or magnets hold items that can’t be clipped.
- Use color‑coded clips: red for urgent items, green for done, yellow for reminders.
- Add a small pocket or pouch next to the board to hold pens, sticky notes or extra clips.
- Integrate lighting: LED strip above or below the board to softly illuminate your message center.
- Use seasonal clips: for holidays, swap decorative cover pins (e.g. shaped like pumpkins, stars) so even the way you clip changes seasonally.
This transforms your front door into a practical communication hub with flair.
Method 5: Pop‑Out Accent Shapes / Silhouette Clips
Idea: Use clothespin “arms” or clips as small “pop-out” silhouette elements: clip shaped cutouts—birds, leaves, stars, geometric shapes—onto the clothespins mounted at intervals on your door or around windows near the door.
Why it’s clever: It adds dimensional detail with motion (clips can gently move in breeze), and makes your door a constantly evolving installation, especially when shapes are seasonal.
Materials
- Clothespins mounted vertically or horizontally along door or trim (spaced regularly)
- Lightweight silhouette cutouts (thin plywood, acrylic, heavy cardstock sealed)
- Small loops, jump rings, miniature wire or string to hang cutouts from clips
- Paints, decorative finishes for silhouettes
- Sealer (if outdoors)
Steps
- Install clothespins as clips or hangers
Mount a row of clothespins (or clusters) along a horizontal trim or frame near the door. - Prepare silhouette pieces
Cut shapes like leaves, birds, stars, snowflakes, geometric forms out of thin wood veneer, acrylic, or thick cardstock. Paint or finish them, then seal them for outdoor durability. - Attach hanging wire or loops
Attach a small wire loop, jump ring, or string to each silhouette, creating a small hanging loop. - Clip silhouettes
Clip the silhouette loops onto clothespins. They will dangle and occasionally sway, adding dynamic visual interest. - Swap or change
Change silhouettes by season: snowflakes in winter, leaves in fall, flowers in spring, stars in summer. Or mix them together for layered effect.
Variation Ideas
- Use mirrored or metallic silhouettes that catch light and shimmer.
- Combine silhouette clips with dried foliage or faux vines to create natural movement.
- For vertical alignments, have clips and silhouettes cascade downward (like a nature mobile).
- Use some silhouettes as reflectors (thin mirrored acrylic) to bounce light.
- Backlight with soft LED strips so silhouettes cast dramatic shadows onto the door at dusk.
This method gives you flexible, animated décor that shifts with movement and season.
Method 6: Clothespin Wind Chime or Door Bell Accent
Idea: Build a small wind chime or gentle door-side “bell” using clothespins as structural elements or Hangers, integrating small chime parts or decorative sound-making elements.
Why it’s charming: It adds pleasant auditory cues whenever the wind or door motion moves the setup. It blends auditory and visual enhancement, making your entry space more sensory.
Materials
- A top support structure (wood slat, ring, driftwood piece)
- Clothespins clipped or mounted along or around the support
- Hanging rods, small tubes, metal chime bars, beads, shells, small washers or bells
- Thin fishing line, wire, or string
- Sealer for outdoor durability
Steps
- Prepare the top support
Use a horizontal bar or ring to serve as the anchor for hanging components. Seal/finish if needed. - Attach clothespins on support
Clip or affix clothespins around the support, either as decorative elements or as actual hangers for chime strings. - String hanging chime elements
From each clothespin or from between them, hang string lengths with small chime elements (metal tubes, bells, washers, shells). Adjust lengths so they gently collide or move with wind. - Balance & test
Once hung, test the movement and sound. Trim string lengths until the chime is harmonious (not too loud, not too sparse). - Mount near the door
Hang it just above or to one side of the front door, so that opening/closing or breeze stirs it gently.
Design Variations
- Use wooden beads, driftwood, glass beads as decorative additions.
- Paint clothespins and chime parts in coordinating or contrasting colors.
- Use recycled keys, small metal discs, flat washers for soft chime tones.
- For night effect, clip small battery-powered LED bead lights among the strings so they glow faintly when darkness falls.
- Make a “greeting bell”: a central string with a decorative disk that rings lightly when someone touches it upon entering.
This idea gives your entry a gentle auditory signature—neighbors may remark on the sweet musical accent.
Method 7: 3D Layered Decorative Clothespin Overlays
Idea: Create layered, sculptural overlays using clothespins on recessed door panels or flat surfaces. These overlays can form decorative motifs like wreaths, mandalas, scroll patterns, or artistic relief accents.
Why it works: It moves your clothespin decoration off the flat plane into the third dimension, giving your door elegant depth and a “designer touch” while still being lightweight and DIY.
Materials
Click page 2 for more