For tough stains or buildup:
- Let the solution sit on the glass for 5–10 minutes
- This allows the ingredients to work more deeply
- Avoid letting it dry completely—re-wet lightly if needed
🔹 Step 5: Rinse Thoroughly
Use warm water (from a detachable showerhead or bucket) to rinse off the mixture. Be sure to rinse completely to prevent streaks or residue.
🔹 Step 6: Use a Squeegee to Dry
Immediately after rinsing:
- Use a rubber squeegee to remove water from the surface
- Work from top to bottom in straight lines
- This prevents water spots and makes the glass shine
🔹 Step 7: Buff with Microfiber
Finish the job by using a dry microfiber cloth to buff the glass:
- Removes any remaining streaks
- Adds extra shine
- Safe for all types of glass
Bonus: How to Prevent Future Buildup
The best way to keep your shower glass clean is to prevent buildup from happening in the first place. Here’s how:
1. Squeegee After Every Shower
Keep a squeegee in the shower and encourage family members to wipe down the glass after each use. This removes water droplets before they can leave stains.
2. Ventilate the Bathroom
Leave the door open or turn on an exhaust fan after showering to reduce humidity and prevent mold or mildew from forming on the glass or in grout lines.
3. Apply a Glass Sealant
Apply a glass protectant spray once a month to make your shower doors more resistant to water spots and soap scum.
4. Clean Weekly
Make it part of your routine. A quick weekly clean using your dish wand and the Jet Dry + dish soap combo will keep your doors crystal clear with minimal effort.
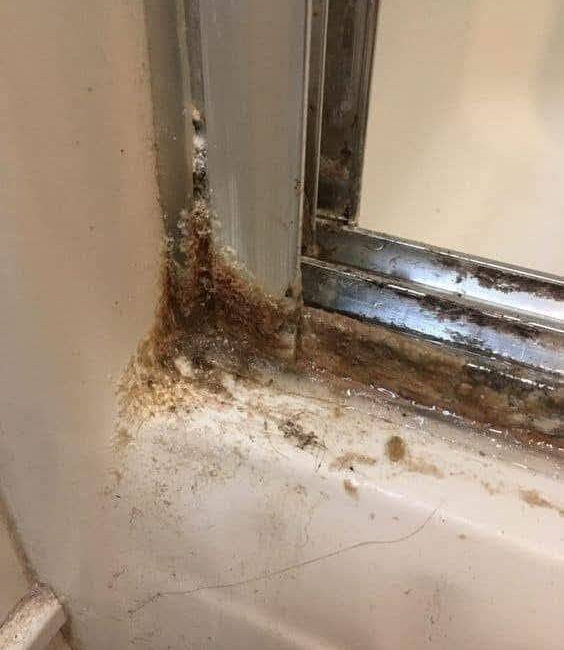
What If You Have Extreme Buildup?
If your shower doors haven’t been cleaned in months (or years), and you’re dealing with thick layers of scum or mineral stains, try these tips:
- Use a vinegar spray beforehand to help break down minerals
- Let cleaning mixtures sit longer before scrubbing
- Repeat the Jet Dry + dish soap method twice in a row
- Use a razor blade scraper for hard water spots—but only if you’re confident it won’t scratch your glass
Environmentally Friendly, Budget-Friendly, and Highly Effective
Many people spend hundreds of dollars on commercial bathroom cleaners, thinking that only name-brand chemicals can do the job. But this DIY method proves otherwise. Using just two common ingredients, you get:
- Professional-level results
- Reduced environmental impact
- Significant cost savings
- No harsh chemical fumes
You’ll also avoid accidentally damaging coatings, stripping finishes, or exposing your family to potentially toxic ingredients.
Final Thoughts: Let Your Shower Shine
The bathroom is a sanctuary—a place to start and end your day. Nothing ruins that fresh, clean feeling like stepping into a grimy, cloudy shower. But you don’t need to tolerate it. With two ingredients, a dish wand, and ten minutes of your time, you can turn dull, dirty shower doors into clear, shining glass that looks brand new.
This simple method is more than just a cleaning tip. It’s a habit that transforms your home, simplifies your routine, and helps you fall back in love with your bathroom.
So, next time you glance at those streaky glass doors and sigh, remember this: you already have what you need to make them sparkle.
Shine on.