If you’ve ever experienced a weak flame on your stove or noticed that your burners are not heating as efficiently as they used to, chances are your burner nozzles might be clogged. Over time, grease, food particles, dust, and debris can build up inside the tiny holes of the stove burners, restricting the flow of gas and resulting in uneven or weak flames.
Before rushing out to buy expensive replacements or calling a professional, there’s a simple, effective, and affordable homemade trick you can use to unclog your stove burner nozzles and restore a stronger, more efficient flame. In this article, we will walk you through everything you need to know — from understanding why your stove flame weakens, identifying clogged nozzles, to step-by-step instructions on how to clean and maintain your burners using household items.
By following these tips, you’ll improve your cooking efficiency, save money, and extend the lifespan of your stove. Ready to get started? Let’s dive in.
Why Do Stove Burner Nozzles Get Clogged?
Understanding why your stove burner nozzles get clogged helps you appreciate the importance of regular maintenance and proper cleaning.
Causes of Clogged Burner Nozzles:
- Food Residue and Grease: Cooking often produces splashes of oil and food particles that can settle on or inside the burners.
- Dust and Debris: Dust accumulation from the environment can enter burner holes over time.
- Corrosion or Rust: Moisture and spills may cause rust, especially on older burners.
- Hard Water Deposits: If you use water to clean your stove but don’t dry it properly, mineral deposits may form.
- Improper Cleaning: Using inappropriate cleaning methods or tools can worsen clogging.
Signs Your Stove Burner Nozzles Are Clogged
Before performing any cleaning, you want to be sure your burner nozzles are indeed clogged. Here are common signs:
- Weak or Yellow Flames: The flame should ideally be blue and steady. A weak, flickering, or yellow flame often signals poor gas flow.
- Uneven Flame Distribution: If some parts of the burner flame are smaller or missing, blockage is likely.
- Delayed Ignition: Difficulty lighting the burner or inconsistent ignition.
- Gas Smell Without Flame: Gas leaking due to improper combustion.
- Longer Cooking Times: Reduced heat output leads to longer times needed to cook food.
If you experience these issues, it’s a strong indicator your burner nozzles require cleaning.
The Homemade Trick to Unclog Stove Burner Nozzles
Now, the good news: you don’t need harsh chemicals or special tools to clean clogged stove burners. Here’s a simple, natural trick that uses common household items to get your burners back in shape:
What You’ll Need:
- White vinegar
- Baking soda
- Warm water
- A toothbrush or small brush with soft bristles
- A pin, needle, or toothpick
- Dish soap
- A small bowl or container
- Clean cloth or paper towels
Step-by-Step Guide to Cleaning and Unclogging Stove Burner Nozzles
Step 1: Safety First — Turn Off Your Stove and Let It Cool
Before you start any cleaning process, ensure your stove is completely turned off and cooled down to avoid burns or accidents.
Step 2: Remove the Burner Grates and Caps
Take off the stove burner grates and burner caps carefully. Most stove burners are designed so these parts can be lifted off easily for cleaning.
Step 3: Soak the Burner Caps and Grates
Fill a bowl or sink with warm water, add a few drops of dish soap, and soak the burner caps and grates for 15 to 20 minutes. This helps loosen stuck-on grease and food residues.
Step 4: Prepare a Baking Soda and Vinegar Paste
In a small bowl, mix two tablespoons of baking soda with enough white vinegar to make a thick paste. The mixture will fizz — this reaction helps break down grime and buildup.
Step 5: Apply the Paste to the Burner Caps and Nozzles
Use your toothbrush or small brush to apply the baking soda and vinegar paste liberally on the burner caps and around the burner nozzles.
Step 6: Scrub Gently
Scrub the surfaces gently, paying particular attention to clogged holes. The paste will help dissolve grease and mineral deposits.
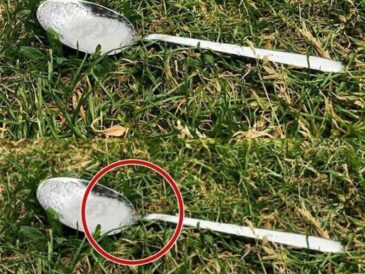
Step 7: Unclog Each Nozzle Hole Using a Pin or Toothpick
After scrubbing, use a pin, needle, or toothpick to carefully clear each tiny hole of the burner nozzles. Be gentle — don’t enlarge or damage the holes, just clear out the clog.
Step 8: Rinse Thoroughly and Dry
Rinse all parts thoroughly with warm water to remove the paste and loosened debris. Dry everything completely with a clean cloth or paper towels. Drying is critical to prevent rust and further buildup.
Step 9: Clean the Burner Base
Wipe the burner base on your stove with a damp cloth. If it’s particularly dirty, use the same baking soda paste and then wipe clean.
Step 10: Reassemble and Test
click page 2 to continue