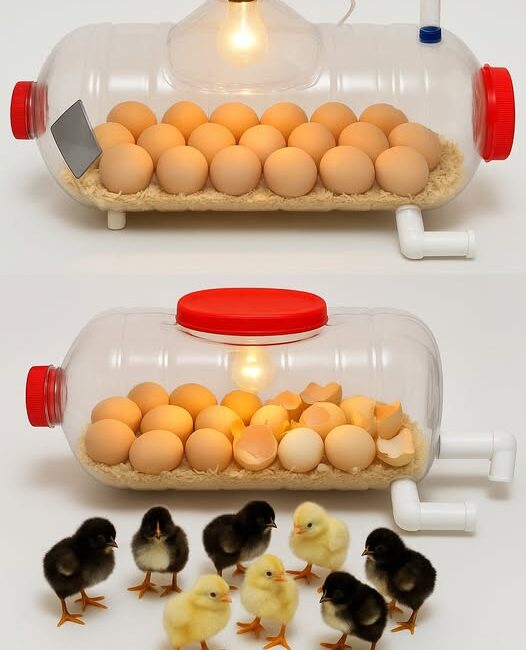
Place the top half of the water bottle over the bottom half, forming a dome that covers the eggs. The two halves should fit snugly with minimal gaps to help retain heat and humidity. Use tape or glue along the seam if necessary, but avoid sealing too tightly as you need to preserve ventilation.
Step 8: Adding the Water Reservoir
Humidity is vital for successful incubation, as it prevents eggs from drying out and helps the embryo develop correctly.
Place a small shallow dish or container filled with water inside the bottom half of the incubator. This will create the necessary moisture inside the enclosed space. Monitor and refill the water as needed throughout the incubation period.
Step 9: Testing and Monitoring Conditions
Before adding eggs, run the incubator for 24 hours and check that:
- Temperature stays steady between 37.2°C and 38°C (99°F to 100.4°F).
- Humidity stays at roughly 50-55% for the initial incubation days.
- Ventilation holes provide sufficient airflow without causing drastic temperature drops.
Adjust the position of the heat source or water reservoir if needed to optimize conditions.
Step 10: Adding Eggs and Managing Incubation
Selecting the Right Eggs
- Choose fertile eggs from a reliable source where hens have been mated with roosters.
- Use eggs no older than 7-10 days for the best hatch rate.
- Avoid washed eggs if possible, as washing can remove the protective bloom.
- Check for uniformity in size and shell condition; avoid cracked or heavily soiled eggs.
Incubation Conditions
- Maintain a constant temperature of 37.5°C (99.5°F).
- Keep humidity at about 50-55% for the first 18 days.
- Increase humidity to 65-70% during the last three days before hatching.
- Turn eggs 3-5 times daily to prevent the embryo from sticking to the shell; stop turning three days before hatch date.
- Use a light source to candle eggs periodically and monitor embryo development.
The Hatching Process
- Stop turning eggs 3 days before the expected hatch.
- Increase humidity to aid chicks in breaking out of their shells.
- Avoid opening the incubator frequently during this time to maintain stable conditions.
- Be patient; hatching can take several hours.
Additional Tips for Success
- Consider building a small frame or stand to hold the water bottle incubator securely.
- Monitor temperature and humidity twice daily.
- Use a small fan outside the incubator to circulate air gently if overheating occurs.
- If using incandescent bulbs, consider a dimmer switch to regulate heat precisely.
- Use a digital hygrometer to track humidity levels.
- Be prepared to adjust water quantity in the reservoir based on ambient air dryness.
Advantages and Limitations of the Water Bottle Incubator
Advantages:
- Extremely low cost.
- Eco-friendly, using recycled materials.
- Portable and easy to set up.
- Educational and engaging project.
Limitations:
- Limited capacity (best for small batches).
- Requires frequent monitoring and manual adjustments.
- Less precise control compared to commercial models.
- Heat source placement critical to avoid hot spots.
Frequently Asked Questions (FAQs)
Q1: Can I incubate eggs other than chicken eggs with this method?
Yes, with slight adjustments in humidity and temperature, you can incubate eggs from ducks, quails, and other poultry.
Q2: How many eggs can I incubate in a water bottle incubator?
Capacity depends on bottle size but generally 4-6 eggs can fit comfortably.
Q3: How long does incubation last?
Chicken eggs typically hatch after 21 days, while duck eggs take 28 days.
Q4: What if the temperature gets too high?
Reduce heat source wattage, increase ventilation, or move the incubator to a cooler location.
Conclusion
Building a homemade egg incubator using a simple plastic water bottle is a rewarding DIY project that brings the marvels of life closer to home. With minimal investment, accessible materials, and some careful monitoring, you can successfully hatch healthy chicks. This sustainable approach fosters a deeper understanding of embryonic development, poultry care, and the value of resourcefulness.
Whether you’re a beginner or an experienced hobbyist, this water bottle incubator project offers an affordable, hands-on way to explore the fascinating world of poultry hatching. Happy hatching!


