Ginger (Zingiber officinale) is more than just a flavorful spice; it’s a powerful medicinal root packed with antioxidants, anti-inflammatory compounds, and digestive benefits. Imagine having fresh ginger right at your fingertips, grown organically in your own home, without buying it at the store. If you’ve ever thought about growing ginger indoors but felt intimidated by the process, you’re in the right place!
This article is your complete, step-by-step guide to successfully growing ginger in water, a simple yet effective method to propagate and nurture ginger rhizomes until they’re ready to thrive on their own. Whether you’re a gardening novice or a seasoned plant enthusiast, this guide will provide you with all the information, tips, and troubleshooting advice you need.
Why Grow Ginger at Home?
Health Benefits of Fresh Ginger
Before we dive into the how-to, let’s highlight why fresh ginger is worth the effort:
- Natural anti-inflammatory properties help reduce pain and swelling.
- Boosts immune health, especially useful during cold and flu seasons.
- Aids digestion and relieves nausea.
- Enhances flavor in teas, soups, smoothies, and countless recipes.
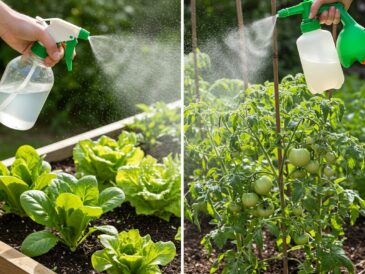
Advantages of Growing Ginger in Water
Growing ginger in water is perfect for beginners because:
- It’s clean and simple—no messy soil to deal with.
- You can monitor root development easily.
- It requires minimal space and supplies.
- It can be started indoors anytime, regardless of season.
- It’s a cost-effective way to propagate organic ginger.
What You’ll Need to Start Growing Ginger in Water 🧂
To ensure success, gather the following materials:
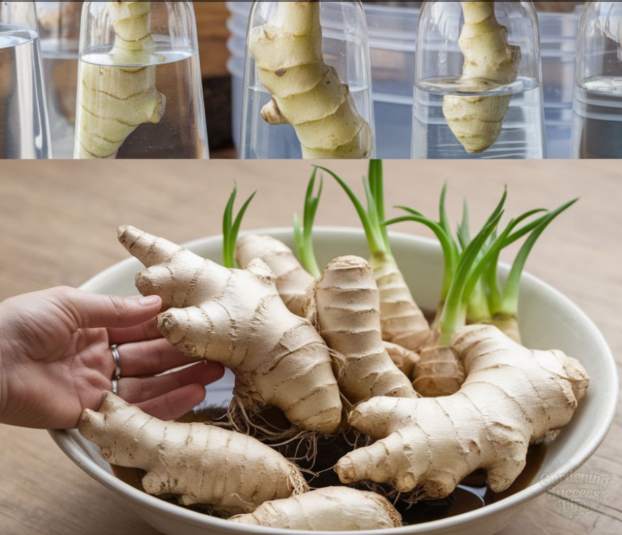
- Fresh Ginger Rhizome: Look for organic, plump ginger with visible “eyes” or growth buds. These eyes are where shoots and roots emerge.
- Shallow Container: A wide, shallow glass or transparent container works best. Glass lets you observe the roots and water level.
- Room-Temperature Water: Use filtered or distilled water if possible to avoid chemicals like chlorine that might inhibit growth.
- Indirect Sunlight: Ginger prefers bright but indirect sunlight—too much direct sun can dry it out or scorch the shoots.
Step-by-Step Guide to Growing Ginger in Water
Step 1: Selecting Healthy Ginger
Not all ginger rhizomes are created equal. For successful propagation:
- Choose organic ginger from a local market or specialty store.
- Avoid shriveled or moldy pieces.
- Look for rhizomes with several plump, well-defined eyes (these look like small bumps or nodes on the surface).
- The ginger should be firm to the touch and smell fresh.
Step 2: Soaking the Ginger
Soaking helps rehydrate the rhizome and kickstarts root growth.
- Place your ginger piece in a bowl of room-temperature water.
- Let it soak for 8 to 12 hours or overnight.
- This softens the skin and primes the buds for sprouting.
Step 3: Setting Up Your Water Garden
Now, it’s time to arrange the ginger for rooting.
- Fill your shallow glass container with room-temperature water.
- Place the ginger with the eyes facing upward.
- Submerge half of the rhizome in water—don’t drown the whole piece as that may cause rot.
- Make sure the ginger is stable and doesn’t float; you can use small stones or glass beads at the bottom to anchor it.
Step 4: Finding the Right Spot
- Set the container in a bright spot with indirect sunlight—think near a window with sheer curtains or a well-lit room.
- Avoid direct midday sun which may overheat or dry out the rhizome.
- Ideal temperature range: 65°F to 75°F (18°C to 24°C).
Step 5: Maintaining Your Ginger
Keeping the water clean and fresh is essential.
- Change the water every 3 to 4 days to prevent mold and bacterial growth.
- Rinse the container before refilling to keep it sanitary.
- Inspect the ginger regularly for signs of mold (white fuzzy patches) or rot (soft, dark areas). Remove any affected parts immediately.
Step 6: Watching for Growth
Patience is key. Here’s what to expect:
- Within 1 to 2 weeks, you’ll notice small white roots emerging from the submerged part.
- Green shoots will begin to sprout from the eyes.
- Roots will continue growing, spreading, and branching as the days go by.
Click page 2 for more