Potatoes are among the most popular and rewarding crops for home gardeners and commercial farmers alike. However, the difference between a mediocre harvest and a bountiful one often comes down to how you prepare and plant your seed potatoes. If you want to boost your potato yield significantly, following the right steps is essential — and there’s one secret many gardeners overlook that can literally double your harvest.
In this extensive guide, you will learn everything about the optimal timing for planting potatoes, how to properly prepare seed potatoes through chitting, the importance of cutting seed potatoes correctly, and the often-underestimated power of wood ash application before planting. This last step, the use of wood ash, is a game changer for your soil fertility and pest resistance, leading to healthier plants and larger crops.
Let’s dive into these crucial steps in detail to ensure your next potato planting season is your most productive ever.
1. The Right Time to Plant Potatoes: Timing is Everything
One of the fundamental keys to a successful potato harvest is planting at the right moment. Planting too early or too late can stunt growth, reduce yields, and invite disease.
When to Plant
Potatoes should be planted two weeks after the last frost date, when the soil temperature reaches at least 7 °C (45 °F). In most temperate regions, this typically occurs between March and April, but it can vary depending on your local climate.
Why Soil Temperature Matters
- Soil temperature influences seed potato sprouting and root development.
- If planted too early in cold, wet soil, seed potatoes may rot or fail to sprout.
- Warmer soil ensures rapid germination and strong initial growth.
Checking Your Soil Temperature
- Use a soil thermometer to monitor soil warmth.
- Check the temperature in the morning at a depth of about 10 cm (4 inches).
- Only plant once the temperature is consistently at or above 7 °C.
2. Encouraging Potato Sprouting: The Art of Chitting
Before planting, chitting your seed potatoes can give you a significant head start in growth, leading to earlier and bigger yields.
What is Chitting?
Chitting is the process of encouraging seed potatoes to sprout before planting. This pre-sprouting step strengthens the shoots, improves plant vigor, and accelerates harvest time.
How to Chit Potatoes
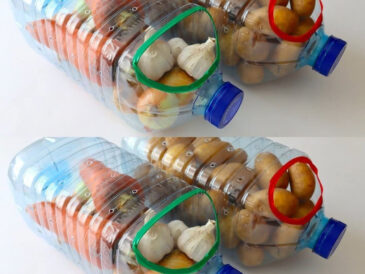
- Select seed potatoes: Use certified seed potatoes to avoid diseases. Avoid supermarket potatoes treated with sprout inhibitors.
- Place in a dark, warm environment at around 21 °C (70 °F) for about 7–10 days. Darkness encourages sturdy sprout development without elongation.
- After initial sprouting, transfer the potatoes to a cooler, lighter place at about 10 °C (50 °F). Exposure to indirect sunlight helps strengthen the green shoots (called “chits”).
Benefits of Chitting
- Leads to earlier emergence from the soil.
- Produces stronger stems and leaves.
- Helps plants establish more quickly, enhancing yield potential.
3. Cutting Seed Potatoes: Maximize Planting Material
Cutting seed potatoes is a common practice to increase the number of plants per tuber, but it must be done correctly to avoid rotting and disease.
How to Cut Seed Potatoes
- Each piece must have at least one healthy sprout (eye).
- Cut larger seed potatoes into pieces weighing roughly 30-50 grams.
- Smaller potatoes can be planted whole.
Drying the Cut Pieces
- Allow cut pieces to dry and heal for 2–3 days at room temperature.
- This forms a protective callus over the cut surfaces, reducing rot and fungal infections.
- Avoid planting immediately after cutting.
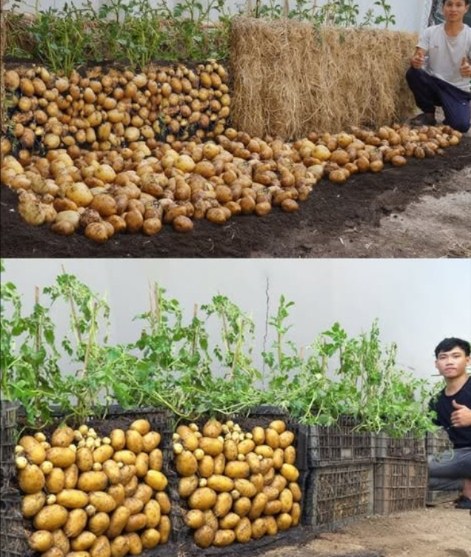
4. The Magic of Wood Ash: Nature’s Soil Booster
Among the many soil amendments, wood ash stands out as a natural fertilizer rich in essential nutrients that dramatically improve potato growth.
Nutrient-Rich Composition
Wood ash contains high levels of:
Click page 2 for more