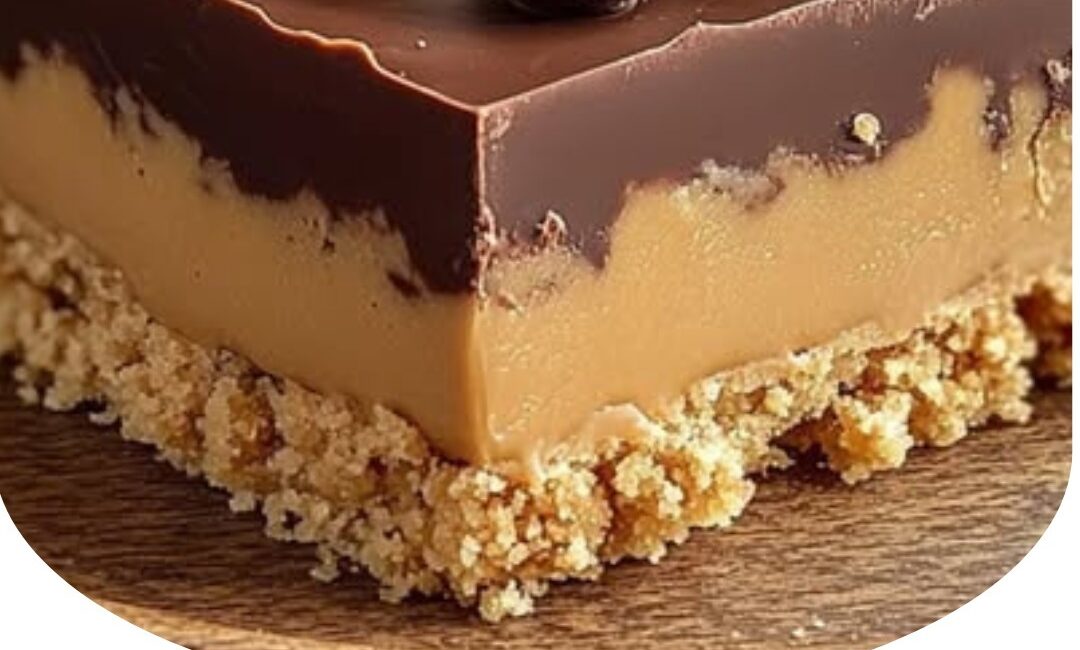
If you’re someone who craves the delicious combination of chocolate and peanut butter but doesn’t want to spend hours in the kitchen, look no further. These Reese’s Peanut Butter No-Bake Bars are the perfect solution to satisfy your sweet tooth with minimal effort and no baking required. Combining the rich, creamy texture of peanut butter with the decadence of semi-sweet chocolate, these bars are an irresistible treat that will become a staple in your dessert repertoire.
Whether you’re hosting a party, planning a holiday celebration, or simply indulging in a personal sweet craving, these bars are sure to impress. Easy to prepare and utterly delicious, they’re the ideal treat to keep in your fridge for whenever you need a quick, chocolatey fix.
Why You’ll Love This Recipe
- No Baking Required: This recipe is perfect for those warm summer days or when you’re looking for a quick dessert that doesn’t involve turning on the oven.
- Decadent & Rich: Layers of peanut butter, chocolate, and graham cracker crust come together to create a mouthwatering combination that’s hard to resist.
- Customizable: You can make these bars your own by adding your favorite mix-ins like chopped peanuts, pretzels, or even Reese’s Pieces for extra flair and crunch.
- Make-Ahead Friendly: These bars can be made in advance and stored in the fridge or freezer, making them the perfect treat to prepare ahead of time for busy days.
- Crowd-Pleasing: Whether it’s a family gathering, a holiday celebration, or a potluck with friends, these no-bake bars are sure to be a hit!
Ingredients You’ll Need
This recipe makes 16–20 bars, depending on how large you cut them. Here’s a breakdown of the ingredients for each layer:
For the Crust:
- 1 ½ cups graham cracker crumbs (about 10–12 graham crackers, crushed)
- ¼ cup granulated sugar
- ½ cup unsalted butter, melted
For the Peanut Butter Layer:
- 1 cup creamy peanut butter
- ½ cup unsalted butter, softened
- 1 cup powdered sugar
For the Chocolate Topping:
- 1 cup semi-sweet chocolate chips
- 2 tablespoons unsalted butter
Optional Add-Ins:
- ½ cup chopped peanuts (for extra crunch)
- ¼ cup Reese’s Pieces (for added flair and flavor)
Step-by-Step Instructions
Step 1: Make the Crust
In a medium mixing bowl, combine the graham cracker crumbs, granulated sugar, and melted butter. Stir the mixture until it resembles wet sand. This will form the base of your bars.
Next, press this mixture evenly into the bottom of an 8×8-inch baking pan. Make sure to line the pan with parchment paper or lightly grease it to prevent sticking and make cleanup easier. Use the back of a spoon or your hands to press the mixture firmly into the pan, ensuring that it’s evenly distributed.
Step 2: Make the Peanut Butter Layer
In a separate bowl, combine the creamy peanut butter, softened butter, and powdered sugar. Mix thoroughly until smooth and creamy. This peanut butter mixture will form the second, indulgent layer of your bars.
Once the peanut butter mixture is well-combined, spread it evenly over the graham cracker crust using a spatula. Take your time to ensure the layer is smooth and even, covering the crust completely.
Step 3: Make the Chocolate Topping
Now it’s time to make the decadent chocolate topping! In a microwave-safe bowl, combine the semi-sweet chocolate chips and unsalted butter. Microwave the mixture in 30-second intervals, stirring after each interval until the chocolate is smooth and fully melted. Be careful not to overheat the chocolate.
Once melted, pour the chocolate mixture over the peanut butter layer and spread it evenly with a spatula. If you’re using chopped peanuts or Reese’s Pieces, you can sprinkle them on top of the chocolate for added crunch and flavor.
Step 4: Chill
Place the pan in the refrigerator and chill for at least 2–3 hours, or until the bars are firm and fully set. This step is essential for the bars to hold their shape when sliced.
Step 5: Slice & Serve
Once the bars are fully set, lift them out of the pan using the parchment paper. Place them on a cutting board and slice them into squares or rectangles, depending on your desired size. Serve chilled for the best texture, or allow them to come to room temperature before enjoying.
Why This Recipe Works
- Layered Magic: The combination of the crunchy graham cracker crust, the creamy peanut butter filling, and the smooth, glossy chocolate topping creates a perfect balance of textures and flavors. Each bite offers something different — a little crunch, a lot of creaminess, and a touch of rich chocolate.
- No-Bake Simplicity: This recipe is as easy as mix, layer, and chill. No need for special equipment like mixers or ovens — just a few simple ingredients and a bit of time in the fridge.
- Customizable Toppings: Feel free to add your own twist by incorporating different toppings. Chopped nuts, pretzels, or even mini peanut butter cups can add extra layers of flavor and texture to your bars.
Variations to Try
This basic recipe is already amazing on its own, but you can get creative and mix things up by trying these variations:
- White Chocolate Drizzle: Melt white chocolate and drizzle it over the top for a visually stunning and tasty touch. The contrast between the rich dark chocolate and the creamy white chocolate is delightful.
- Pretzel Crunch: Crush some pretzels and either mix them into the crust or sprinkle them on top for a sweet-salty twist that adds a satisfying crunch.
- Dark Chocolate Option: For a more intense chocolate flavor, try using dark chocolate chips instead of semi-sweet chocolate. The richness of dark chocolate will complement the peanut butter layer beautifully.
- Gluten-Free Option: Simply substitute gluten-free graham crackers for a gluten-free version of these bars. You can also use gluten-free pretzels in the crust for an extra touch of crunch.
- Nut-Free Version: If you’re catering to nut allergies, you can swap the peanut butter for sunflower seed butter and omit any nut toppings. It still delivers a satisfying, nutty flavor and texture.
Tips for Success
- Press Firmly: When making the crust, be sure to press it down firmly into the pan to prevent it from crumbling when you slice the bars later. A firm base ensures that the bars will hold together well.
- Smooth Layers: To get perfectly smooth layers, dip your spatula in warm water before spreading the peanut butter and chocolate layers. This will help the layers spread more easily and give a more polished look.
- Storage: Store your Reese’s Peanut Butter No-Bake Bars in an airtight container in the fridge for up to 5 days. They can also be frozen for longer storage. Just make sure to wrap them tightly in plastic wrap or store them in a freezer-safe container. To serve after freezing, simply thaw for a few minutes at room temperature.
Serving Suggestions
- Romantic Touch: For a special touch, plate the bars individually with a dusting of powdered sugar or a drizzle of chocolate syrup. This will elevate the presentation and make them feel more like a gourmet treat.
- Party Platter: These bars are perfect for serving on a dessert table. Pair them with other treats like brownies, cookies, or fruit skewers to create a diverse dessert spread that will appeal to all tastes.
- Brunch Staple: They also make a fantastic pairing with coffee or milk for a decadent breakfast or brunch treat.
Final Thoughts
These Reese’s Peanut Butter No-Bake Bars are an ideal dessert when you want something simple yet indulgent. With the right balance of crunchy, creamy, and chocolatey goodness, they’re sure to become a go-to recipe in your collection. Their minimal preparation and make-ahead flexibility make them perfect for parties, casual get-togethers, or just a sweet treat at home.
So why not give this recipe a try? You’ll love how easy and satisfying it is, and your family and friends will love the rich, indulgent flavors. These bars are truly a crowd-pleaser — one bite and you’ll understand why!
Have you tried making no-bake bars before? What are your favorite twists on this classic treat? Share your thoughts and variations below! 🍫