- Pro Tip: You can also turn off the heat at this point and let the mixture sit for around 5 minutes. This helps ensure the curds form properly without being disturbed by the stirring process.
Step 4: Drain the Curds from the Whey
Once the curds have fully formed, it’s time to separate them from the whey. To do this, set up a strainer or cheesecloth over a large bowl or container. Carefully pour the curds and whey into the strainer, allowing the whey to drain away while the curds stay behind in the strainer.
You can use a spoon to gently press the curds and encourage any remaining whey to drain out. If you prefer a drier cheese, you can continue pressing the curds or even wrap them in cheesecloth and let them drain for a little longer.
- Pro Tip: Save the whey! It’s rich in nutrients and can be used for smoothies, soups, or even in baking recipes like bread.
Step 5: Add the Butter and Mozzarella Cheese
Now that you have your fresh curds, it’s time to add flavor and texture to your cheese. Take the 100 grams of butter and cut it into small cubes. Add the butter to the warm curds and stir gently until it’s completely melted and incorporated. The butter will make the cheese creamy and smooth.
Next, chop the 200 grams of mozzarella cheese into small cubes and add them to the curds and butter mixture. Stir until the mozzarella cheese melts and blends with the curds, creating a smooth, creamy cheese mixture.
- Pro Tip: For a stronger flavor, you can also add a pinch of salt to the cheese mixture at this point. Salt not only enhances the flavor but also acts as a preservative.
Step 6: Shape the Cheese
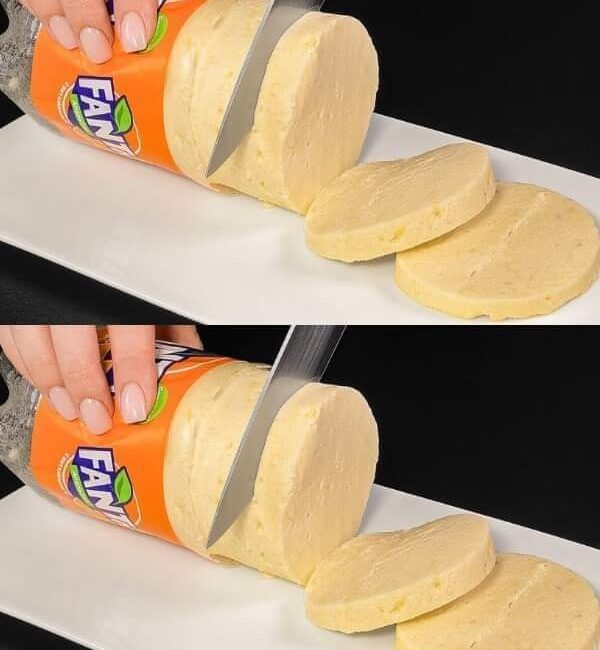
Now comes the fun part — shaping your cheese! Take the empty plastic bottle and cut off the top. Use the bottle as a mold for your cheese. You can press the curds into the bottle, creating a round shape that will help the cheese set.
- Pro Tip: If you want a firmer texture, you can press the curds more firmly into the mold to compact them together. This will give you a more solid block of cheese once it cools.
Step 7: Let the Cheese Cool and Set
Place the molded cheese in the refrigerator for about 30 minutes to allow it to cool and set. This helps the cheese firm up, making it easier to slice and serve.
- Pro Tip: If you don’t have a plastic bottle mold, you can use any container with a similar shape to help your cheese set.
Step 8: Serve and Enjoy Your Homemade Cheese!
After 30 minutes, your homemade cheese is ready to be served! You can slice it up, crumble it over salads, or spread it on bread or crackers. The texture will be soft, creamy, and absolutely delicious — just like mozzarella cheese, but fresh from your kitchen.
- Pro Tip: If you prefer a firmer cheese, you can let it set in the fridge for a longer period (up to 2 hours) to allow it to firm up even more.
Tips for Customizing Your Homemade Cheese:
- Herbs and Spices: Feel free to experiment with adding different herbs and spices to your cheese. Basil, oregano, garlic powder, or chili flakes are great options for adding extra flavor.
- Texture: If you want a firmer cheese, press the curds more firmly during the shaping step. You can also let the cheese sit in the fridge for longer to achieve a firmer consistency.
- Storage: Homemade cheese is best enjoyed fresh, but if you have leftovers, store them in an airtight container in the fridge. Use within a few days to maintain the best flavor and texture.
Conclusion:
Making homemade cheese in just 5 minutes may sound like magic, but it’s really just the magic of simple ingredients and a little creativity. With just milk, vinegar, butter, and mozzarella, you can create a fresh, creamy, and flavorful cheese that rivals store-bought varieties. Whether you’re looking to impress your guests, add a personal touch to your meals, or simply enjoy a delicious homemade treat, making cheese at home is a fun and satisfying experience.
So, the next time you’re craving cheese, skip the store and try making it yourself! It’s easier than you think, and you’ll be amazed at how delicious and rewarding homemade cheese can be. Enjoy! 🧀